I think this DIY will surprise you. When I think of purchasing a cutting board I think of HomeGoods. That would be a typical place I would go to look for one. Have you ever thought of making your own? Not always are DIY’s cheaper to make, but but this one is. The last large cutting board I bought was around $60, this was years ago. At the time I didn’t know what was a good price. I know with the economy wood has been more expensive so I was so surprised when I found this awesome company called Forest 2 Home that sells you the wood in a kit to make your own at such an affordable price and much better quality. I really enjoy doing projects with my husband. We have defiantly evolved as a team while doing them. So It was a no brainer when presented with the opportunity to make our very first cutting board. If you have the tools already, I would consider this a beginner project that anyone can do. Turning 6 pieces of wood into something, is really cool!
Tools:
- Cutting board kit
- Wood Glue
- Large Claps
- Sander
- Router 3/4″ bit (optional but makes a big difference)
- Food Grade cutting board oil
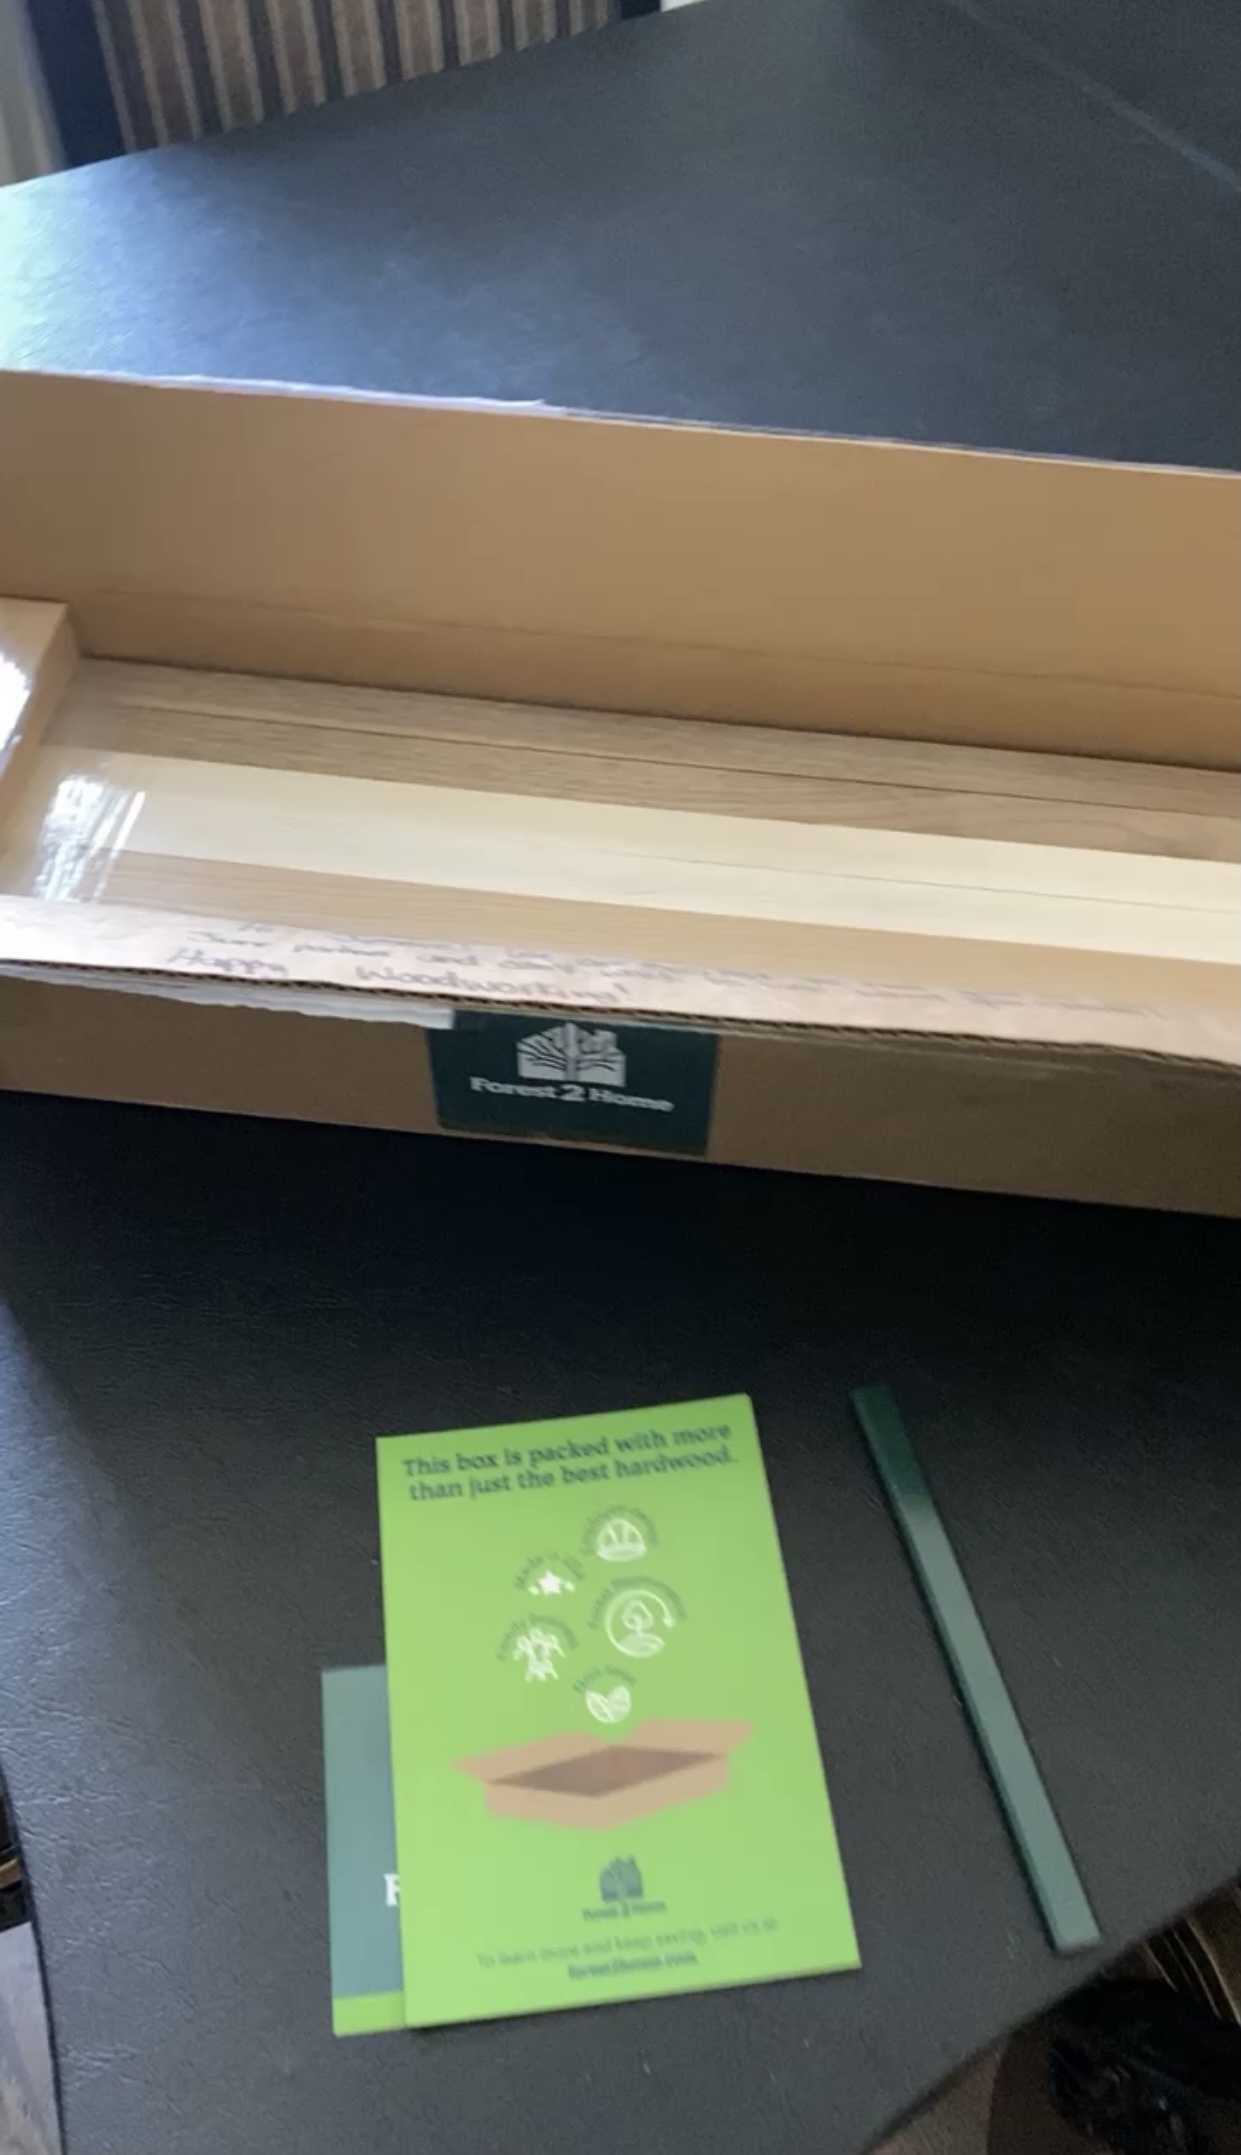
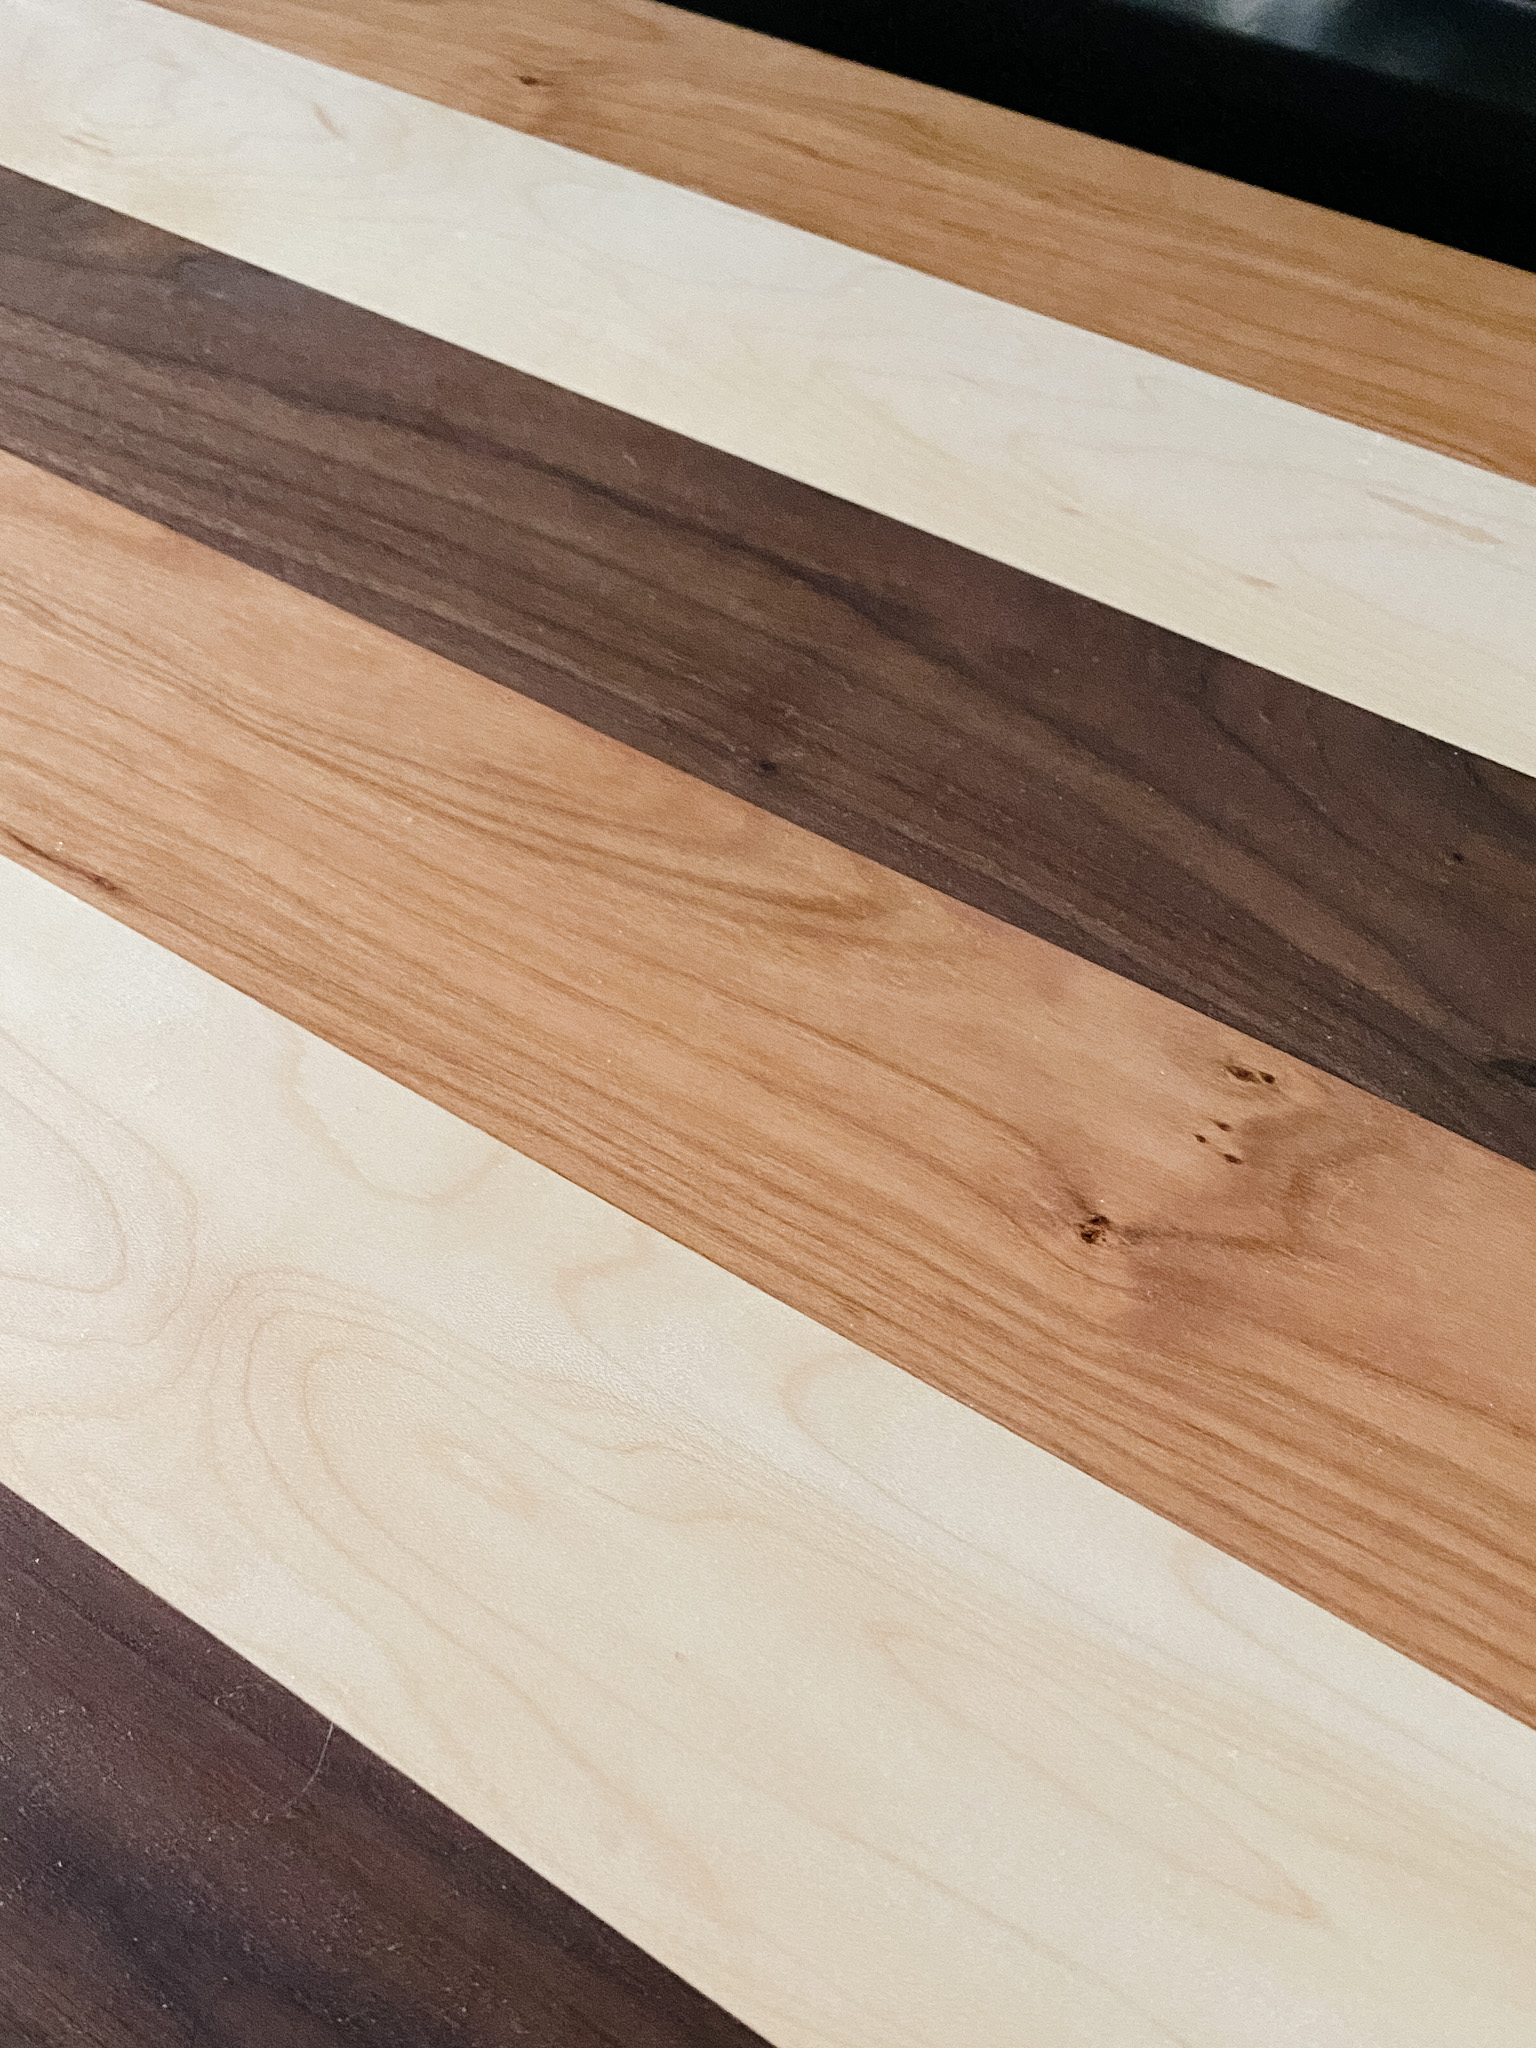
This box came with three types of wood. Walnut, cherry & maple. This is not wood you can buy at a big hardwood store, these are premium woods grown in the North East USA by a family owned company called Forest 2 Home. They offer 8 different types of wood, grown in 3 different states. They make it affordable to supply wood to individual wood workers and the best part is you can have the wood shipped right to your house for free, anywhere here in the USA.
Step 1:
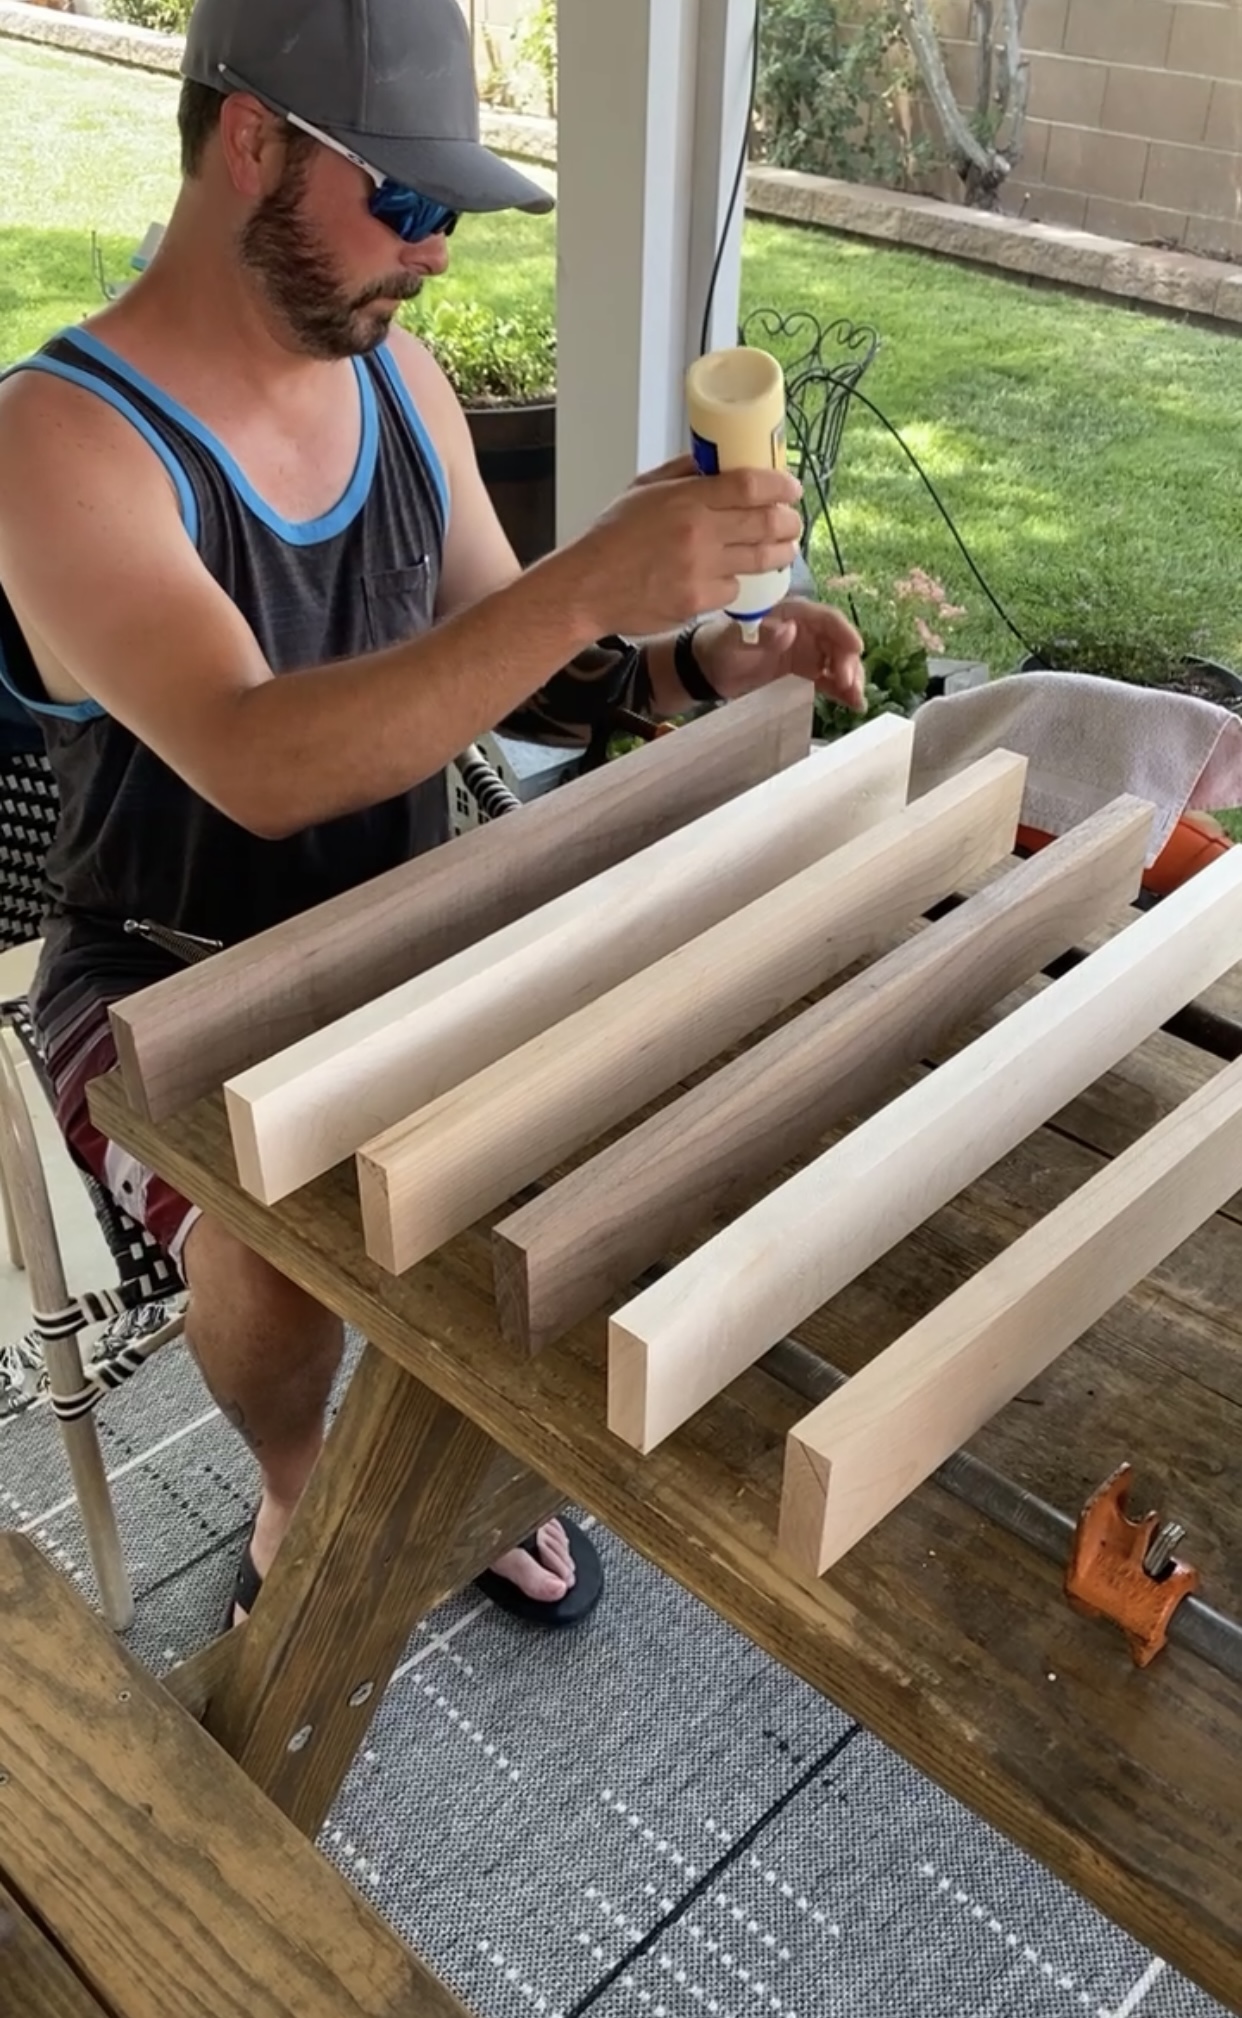
Lay our your wood pieces however you would like them. I did dark, light then medium as you can see in the picture below. Next you put a layer of glue on each side of the wood. Pretty straight forward and easy to do.
Step:2
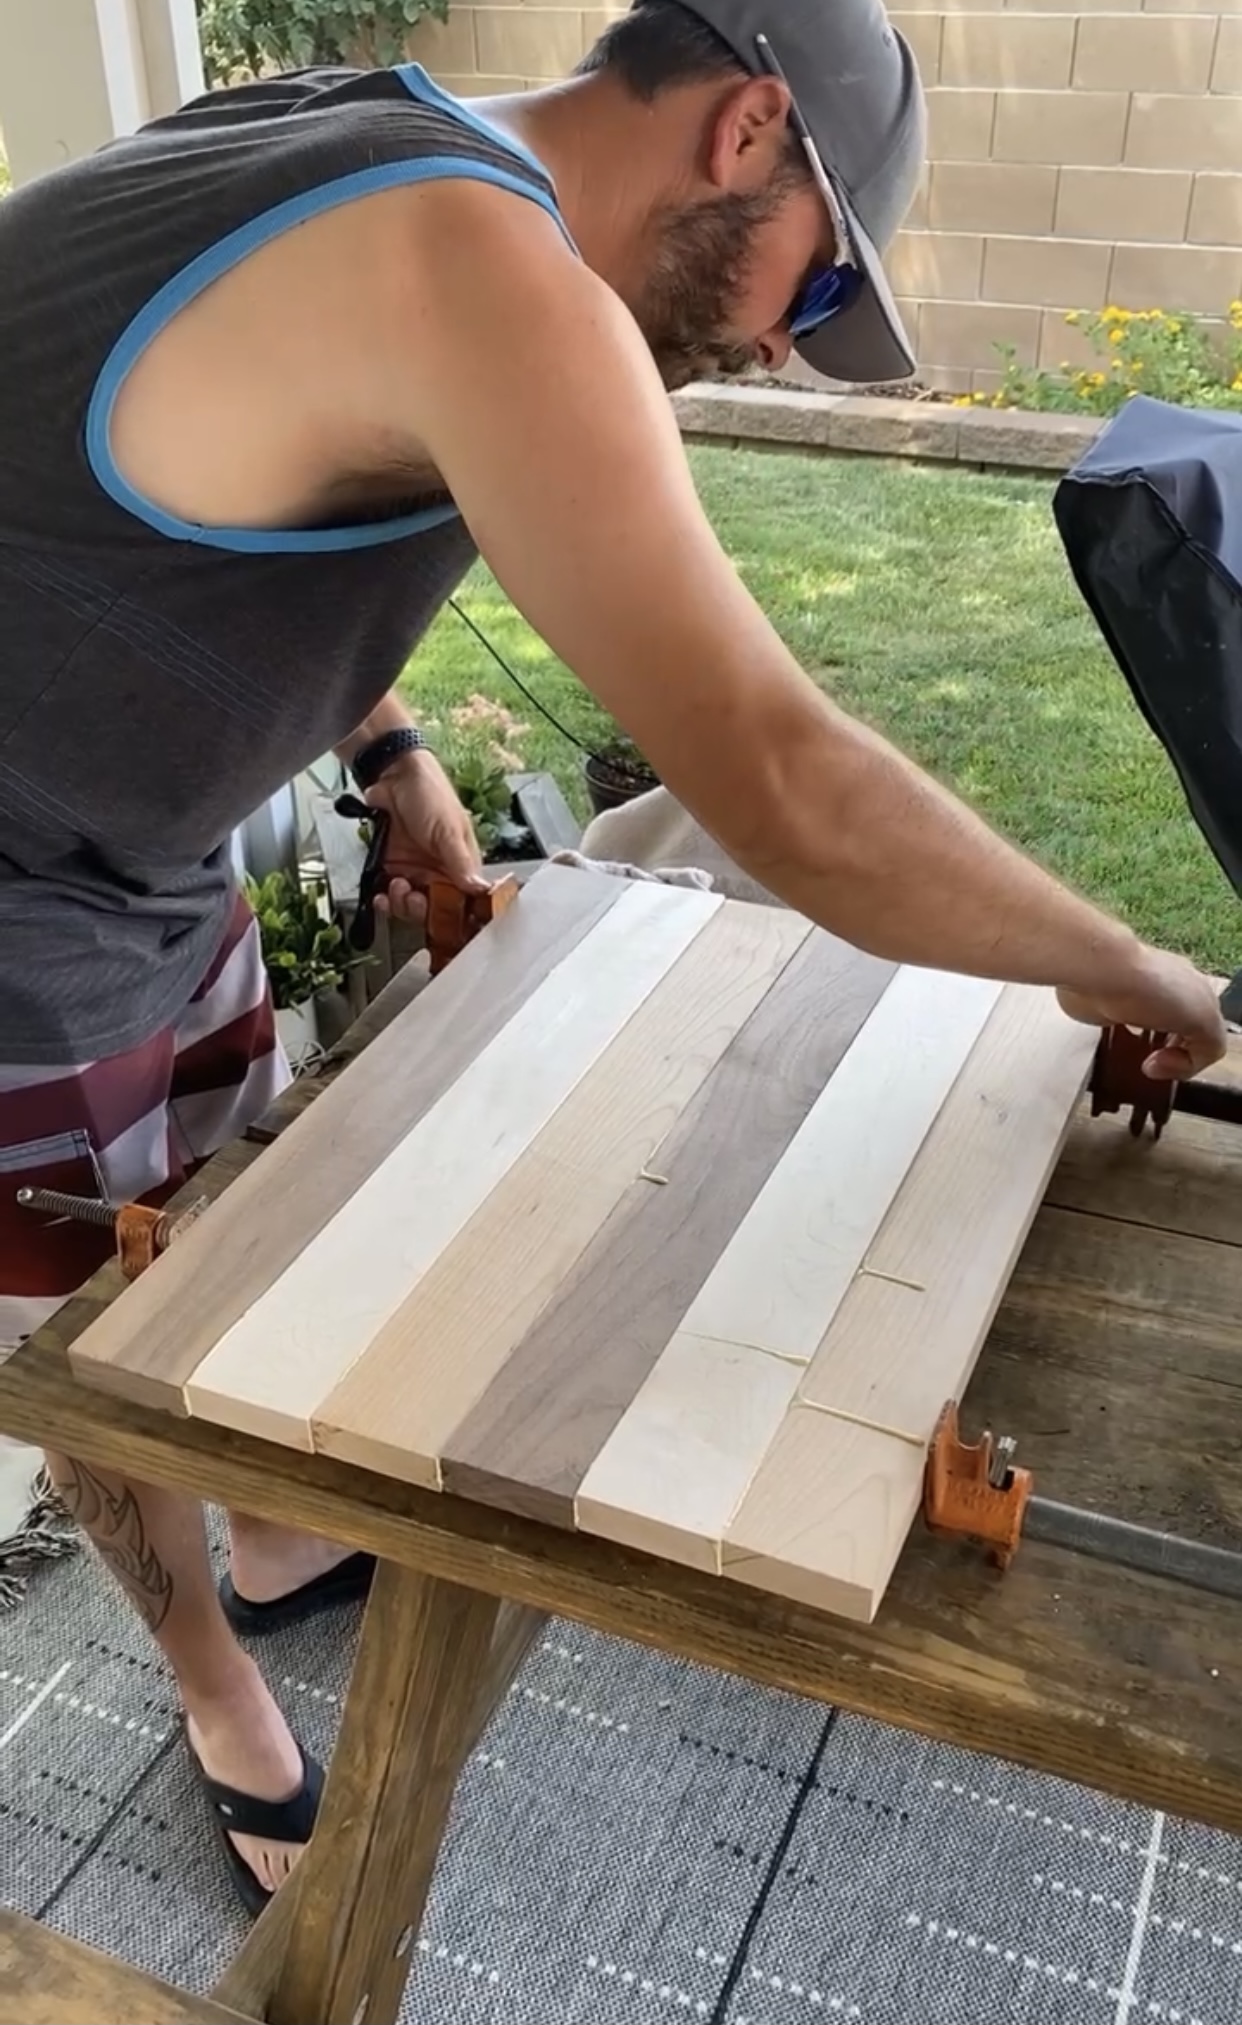
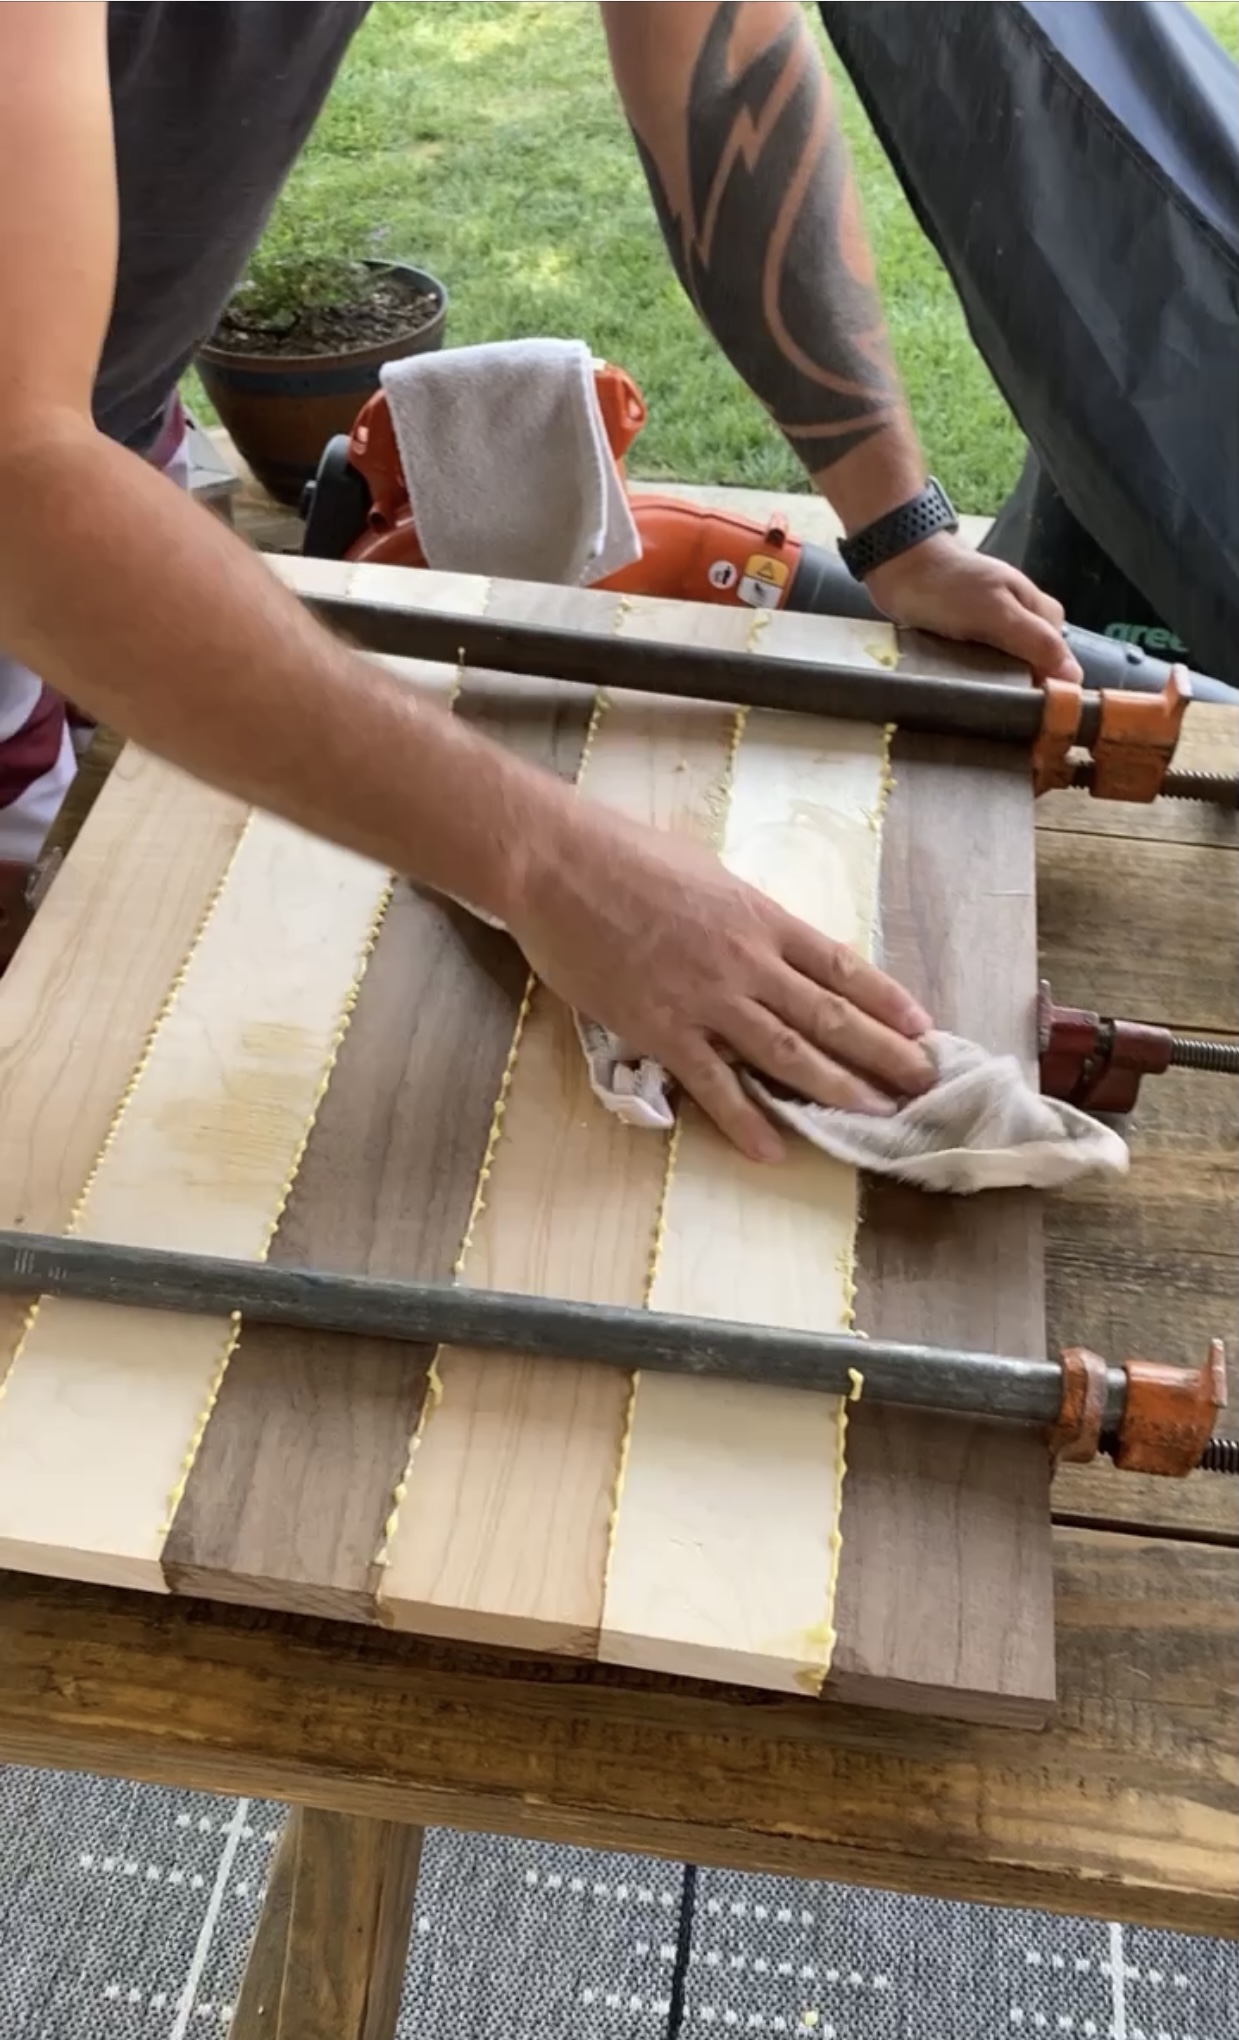
Lay them on your large clamps and line them up the best you can. You will have glue coming out the edges. That’s k. Secure them together the best you can. And line up the sides as even as possible. It’s OK if it’s not perfect you will be able to get out the imperfections when you sand it.
Step 3:
Take a damp rag and clean up the excess glue the best you can. Allow this to dry fully at least 24 hours.
Step 4:
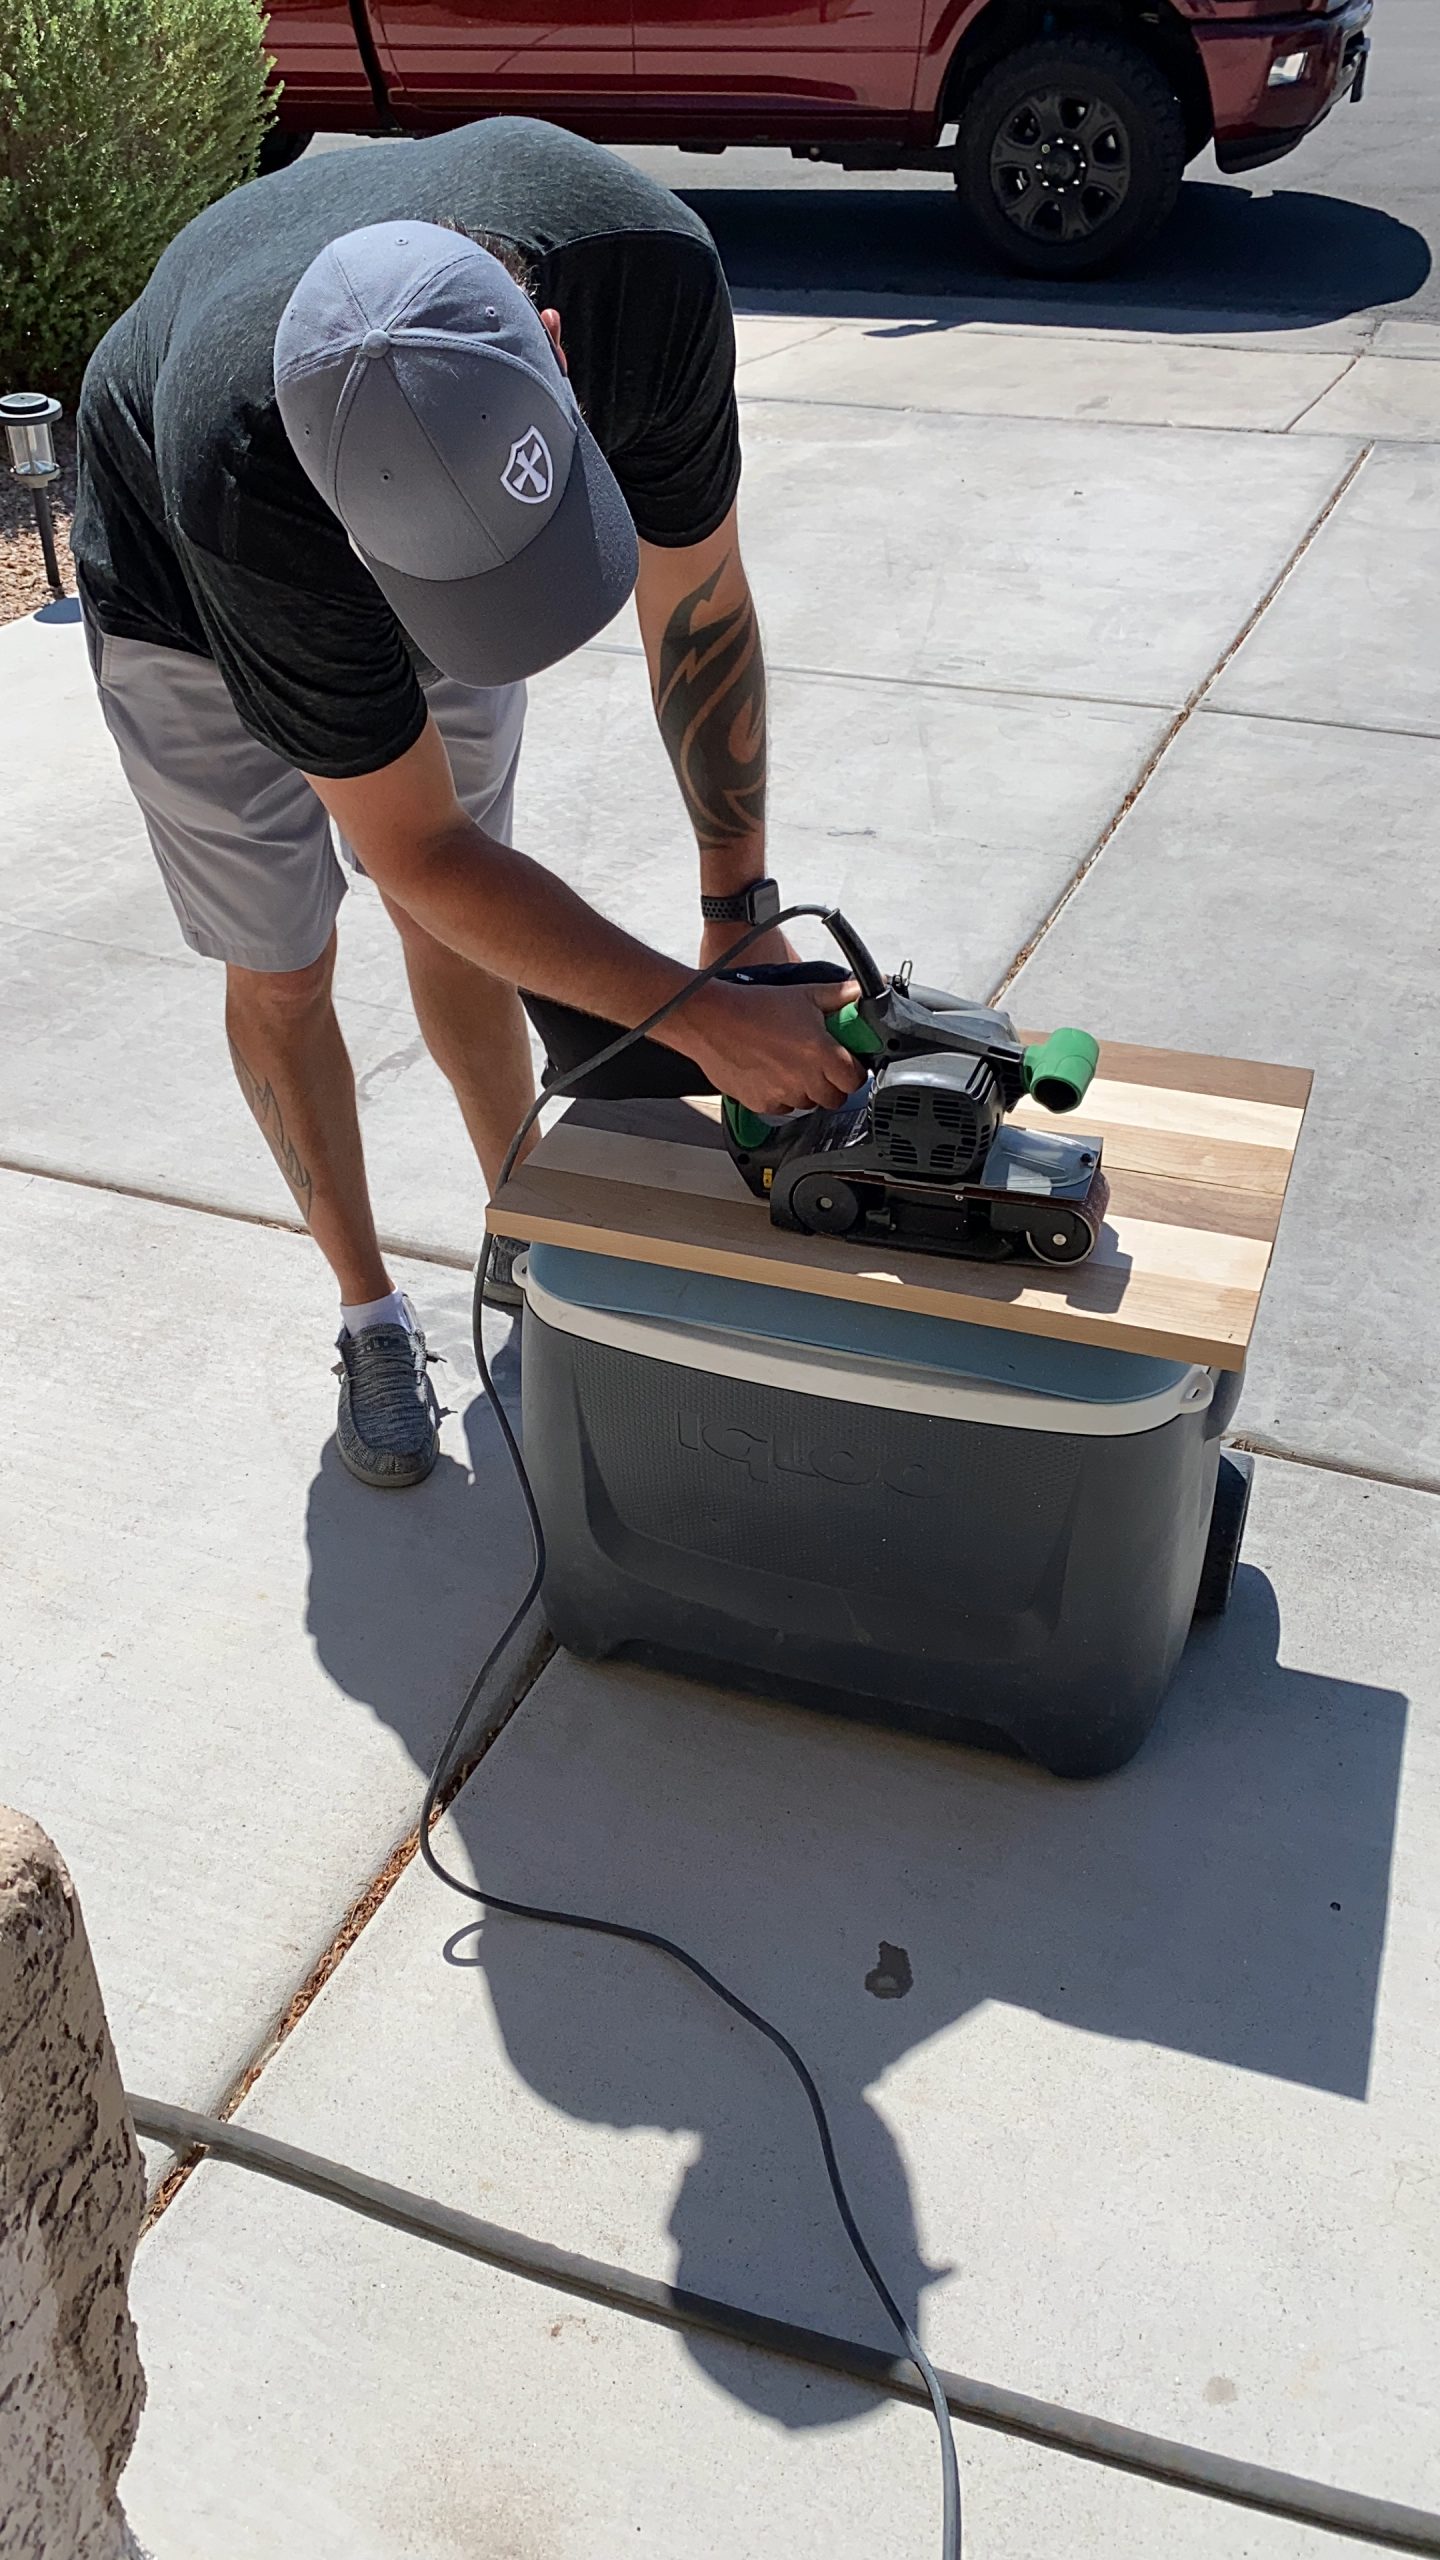
Once dry, you are ready to sand. We happen to have a belt sander to make it a little easier but a regular standard will do just fine. I don’t have it pictured here but after he uses the belt sander on both sides. He took a regular sander with 120 grit.
Step 5:
This is the oil we chose to bring out the natural beauty in the wood. It is 100% food grade. And can be purchased here. Wait till you see the magic happen…..

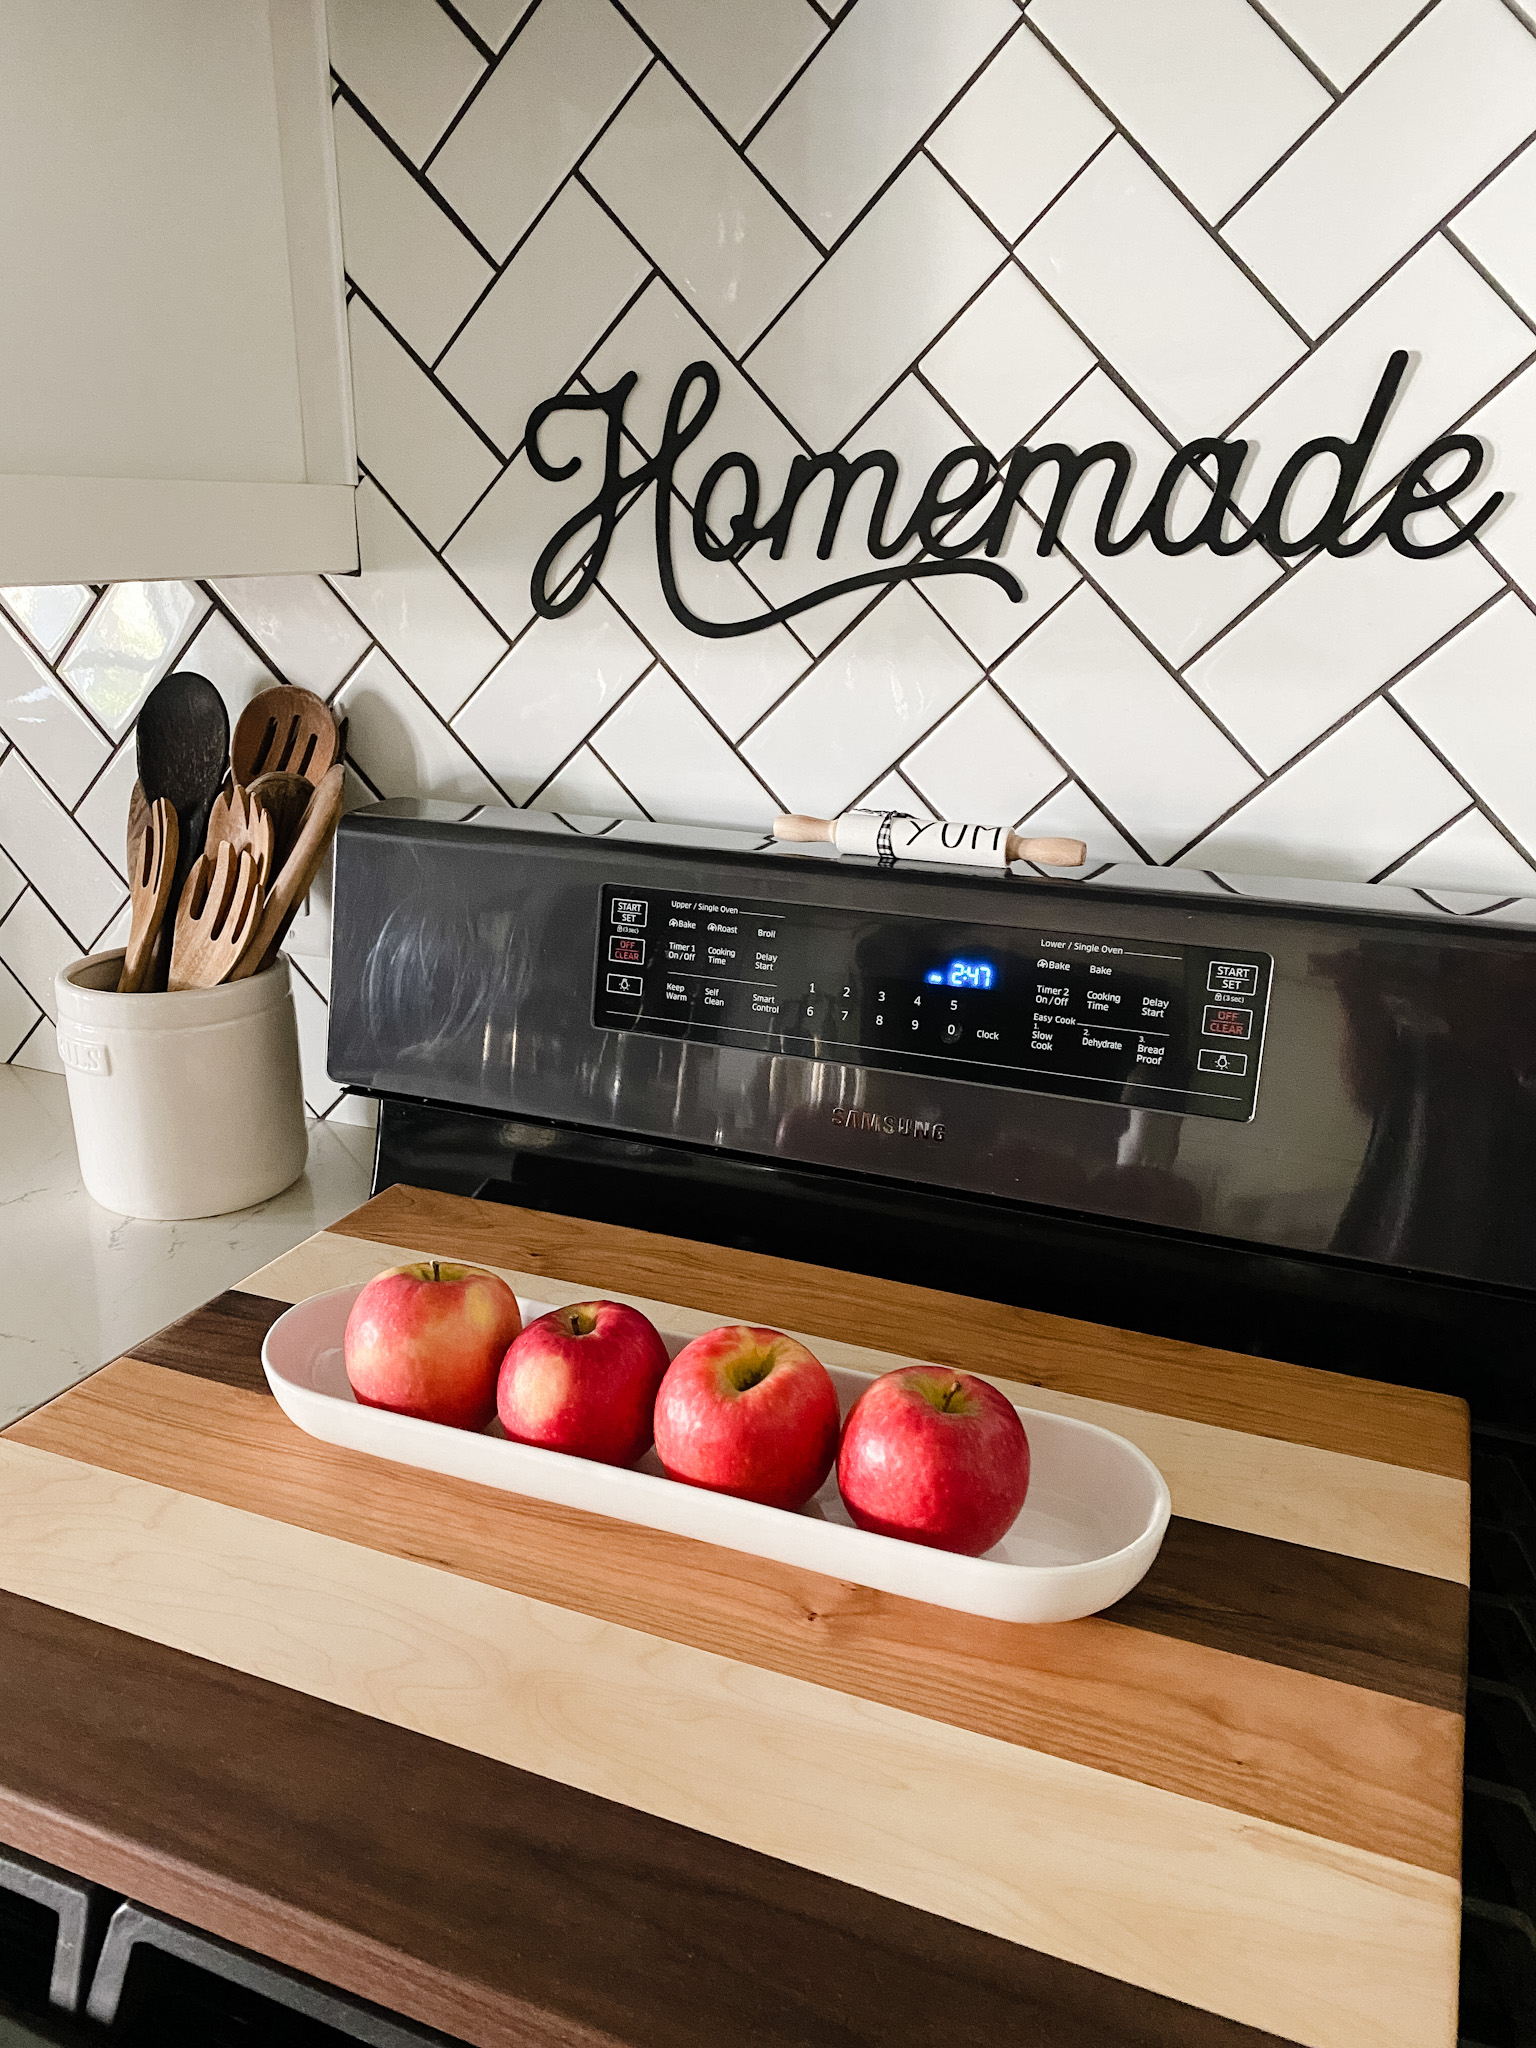
It’s like night and day!. Look how vibrant those colors are?
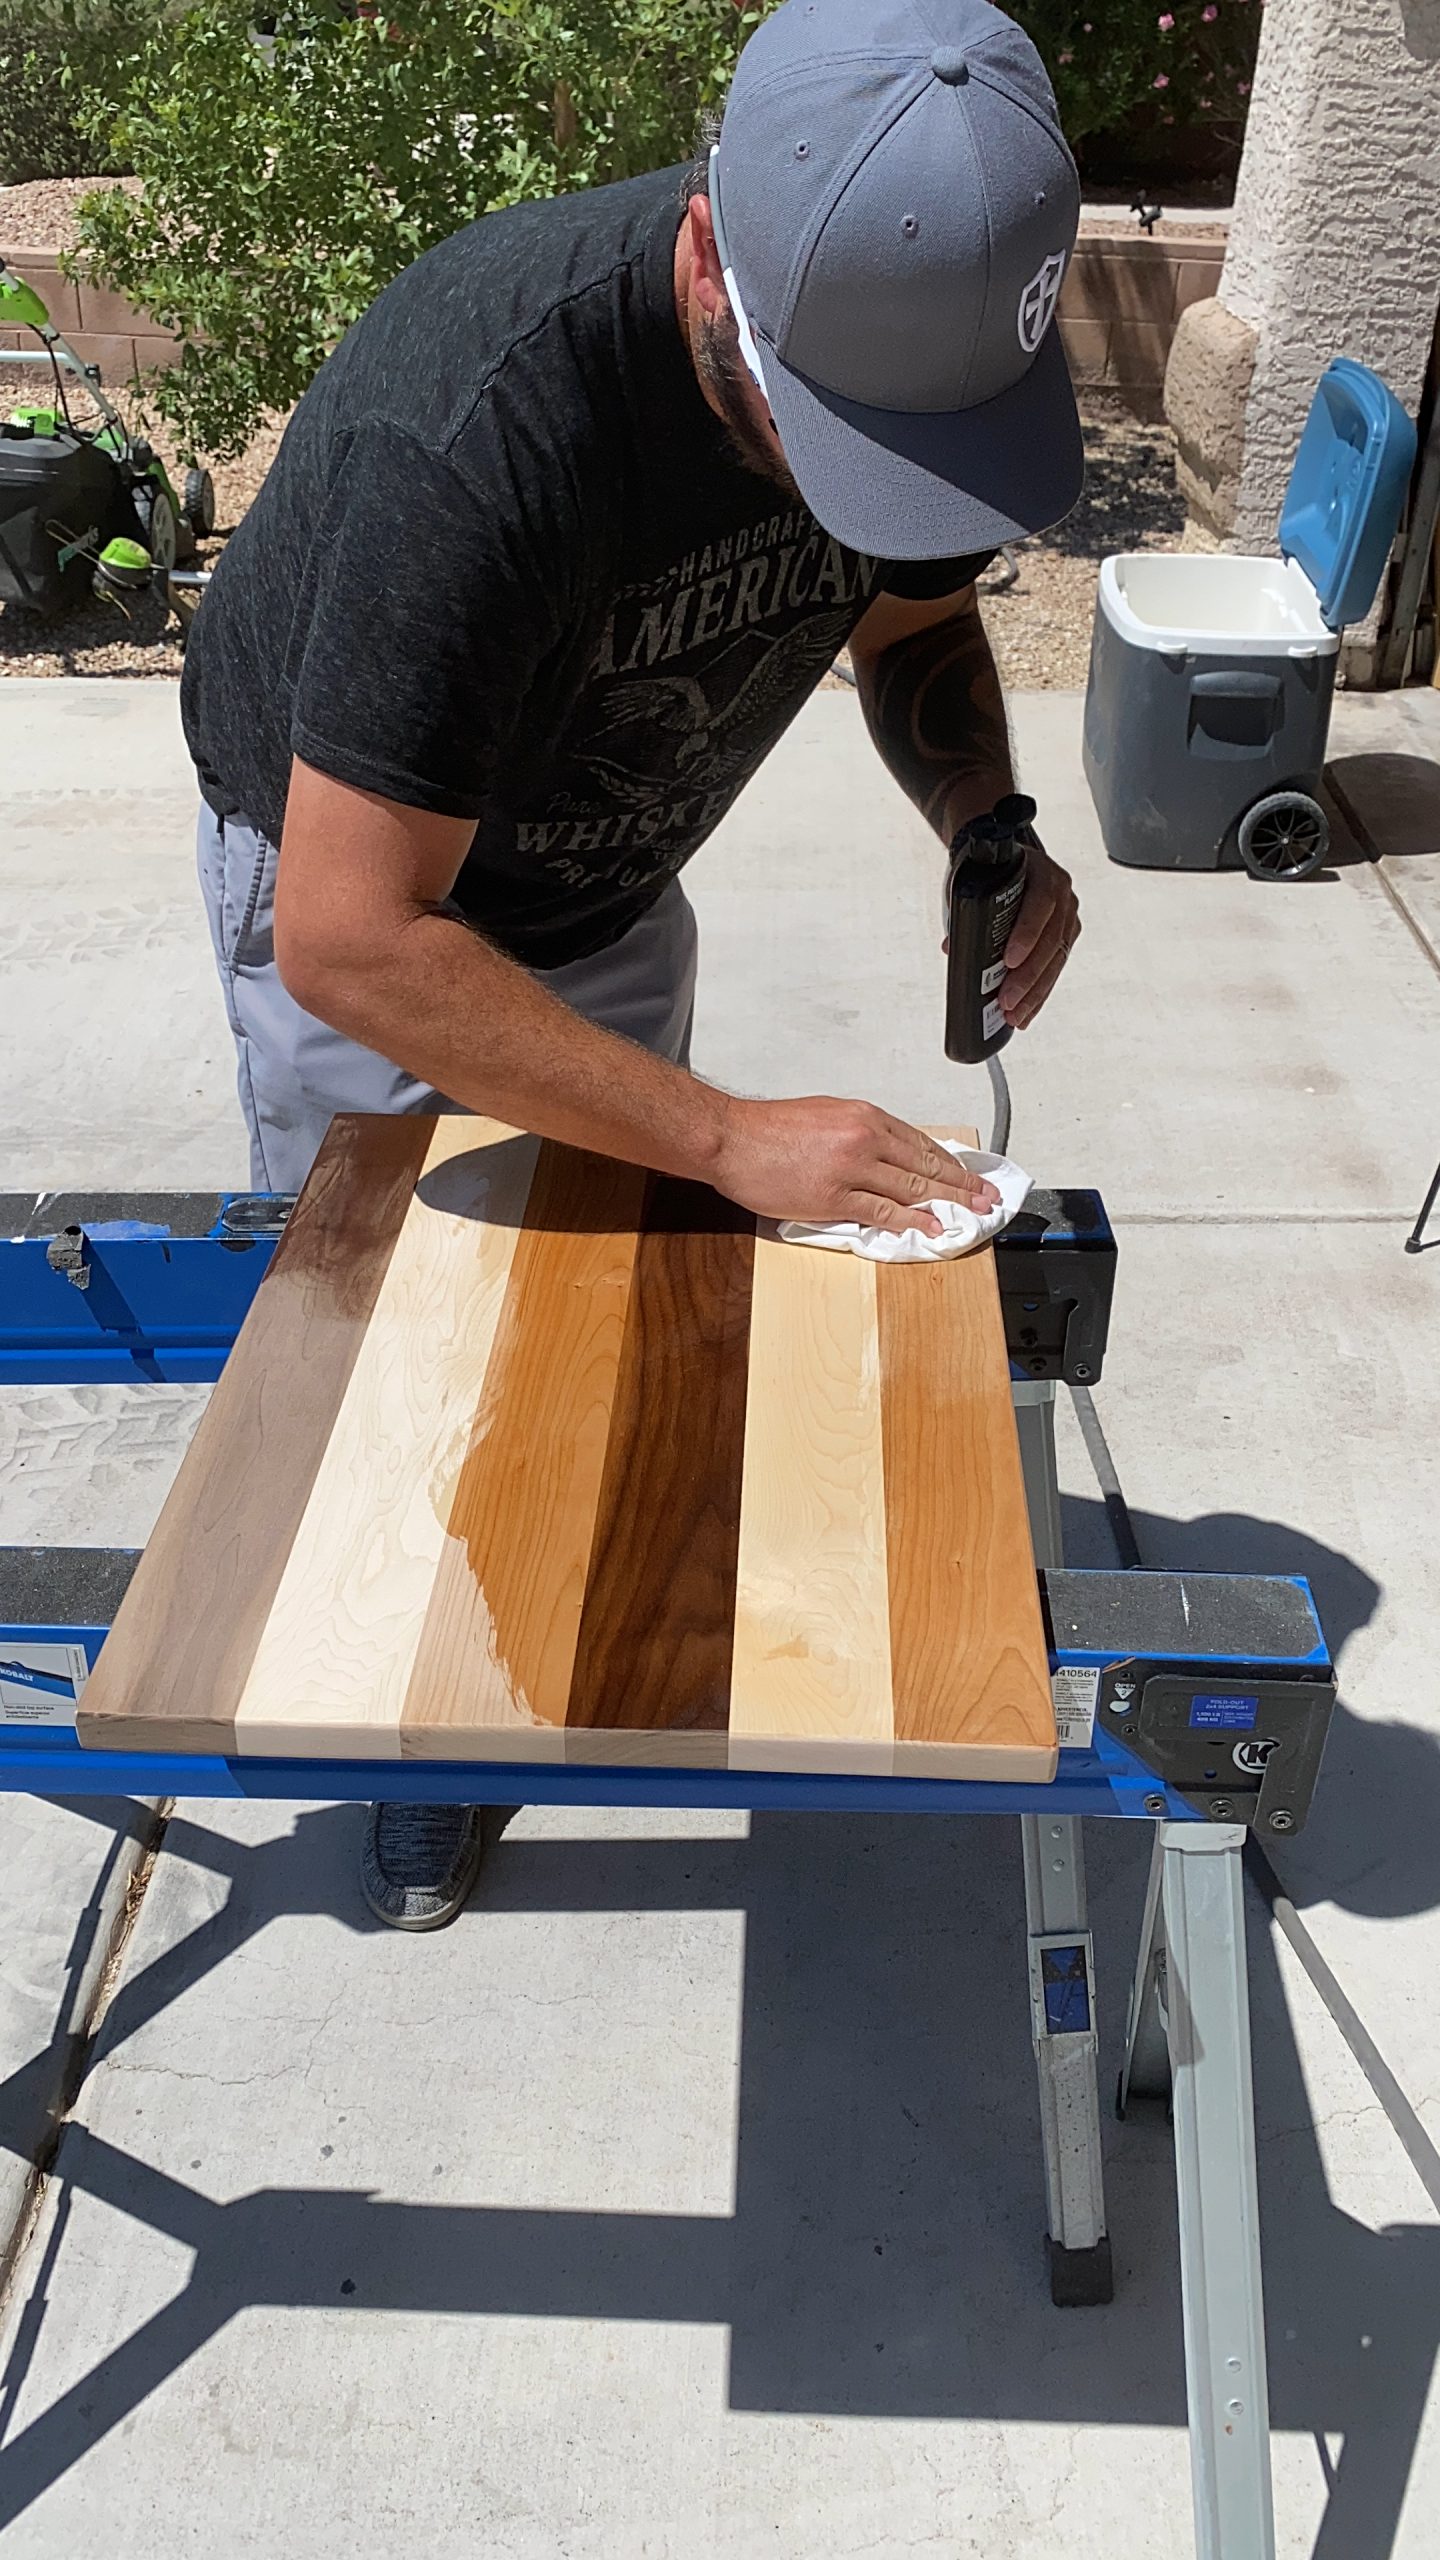
Soooo beautiful!
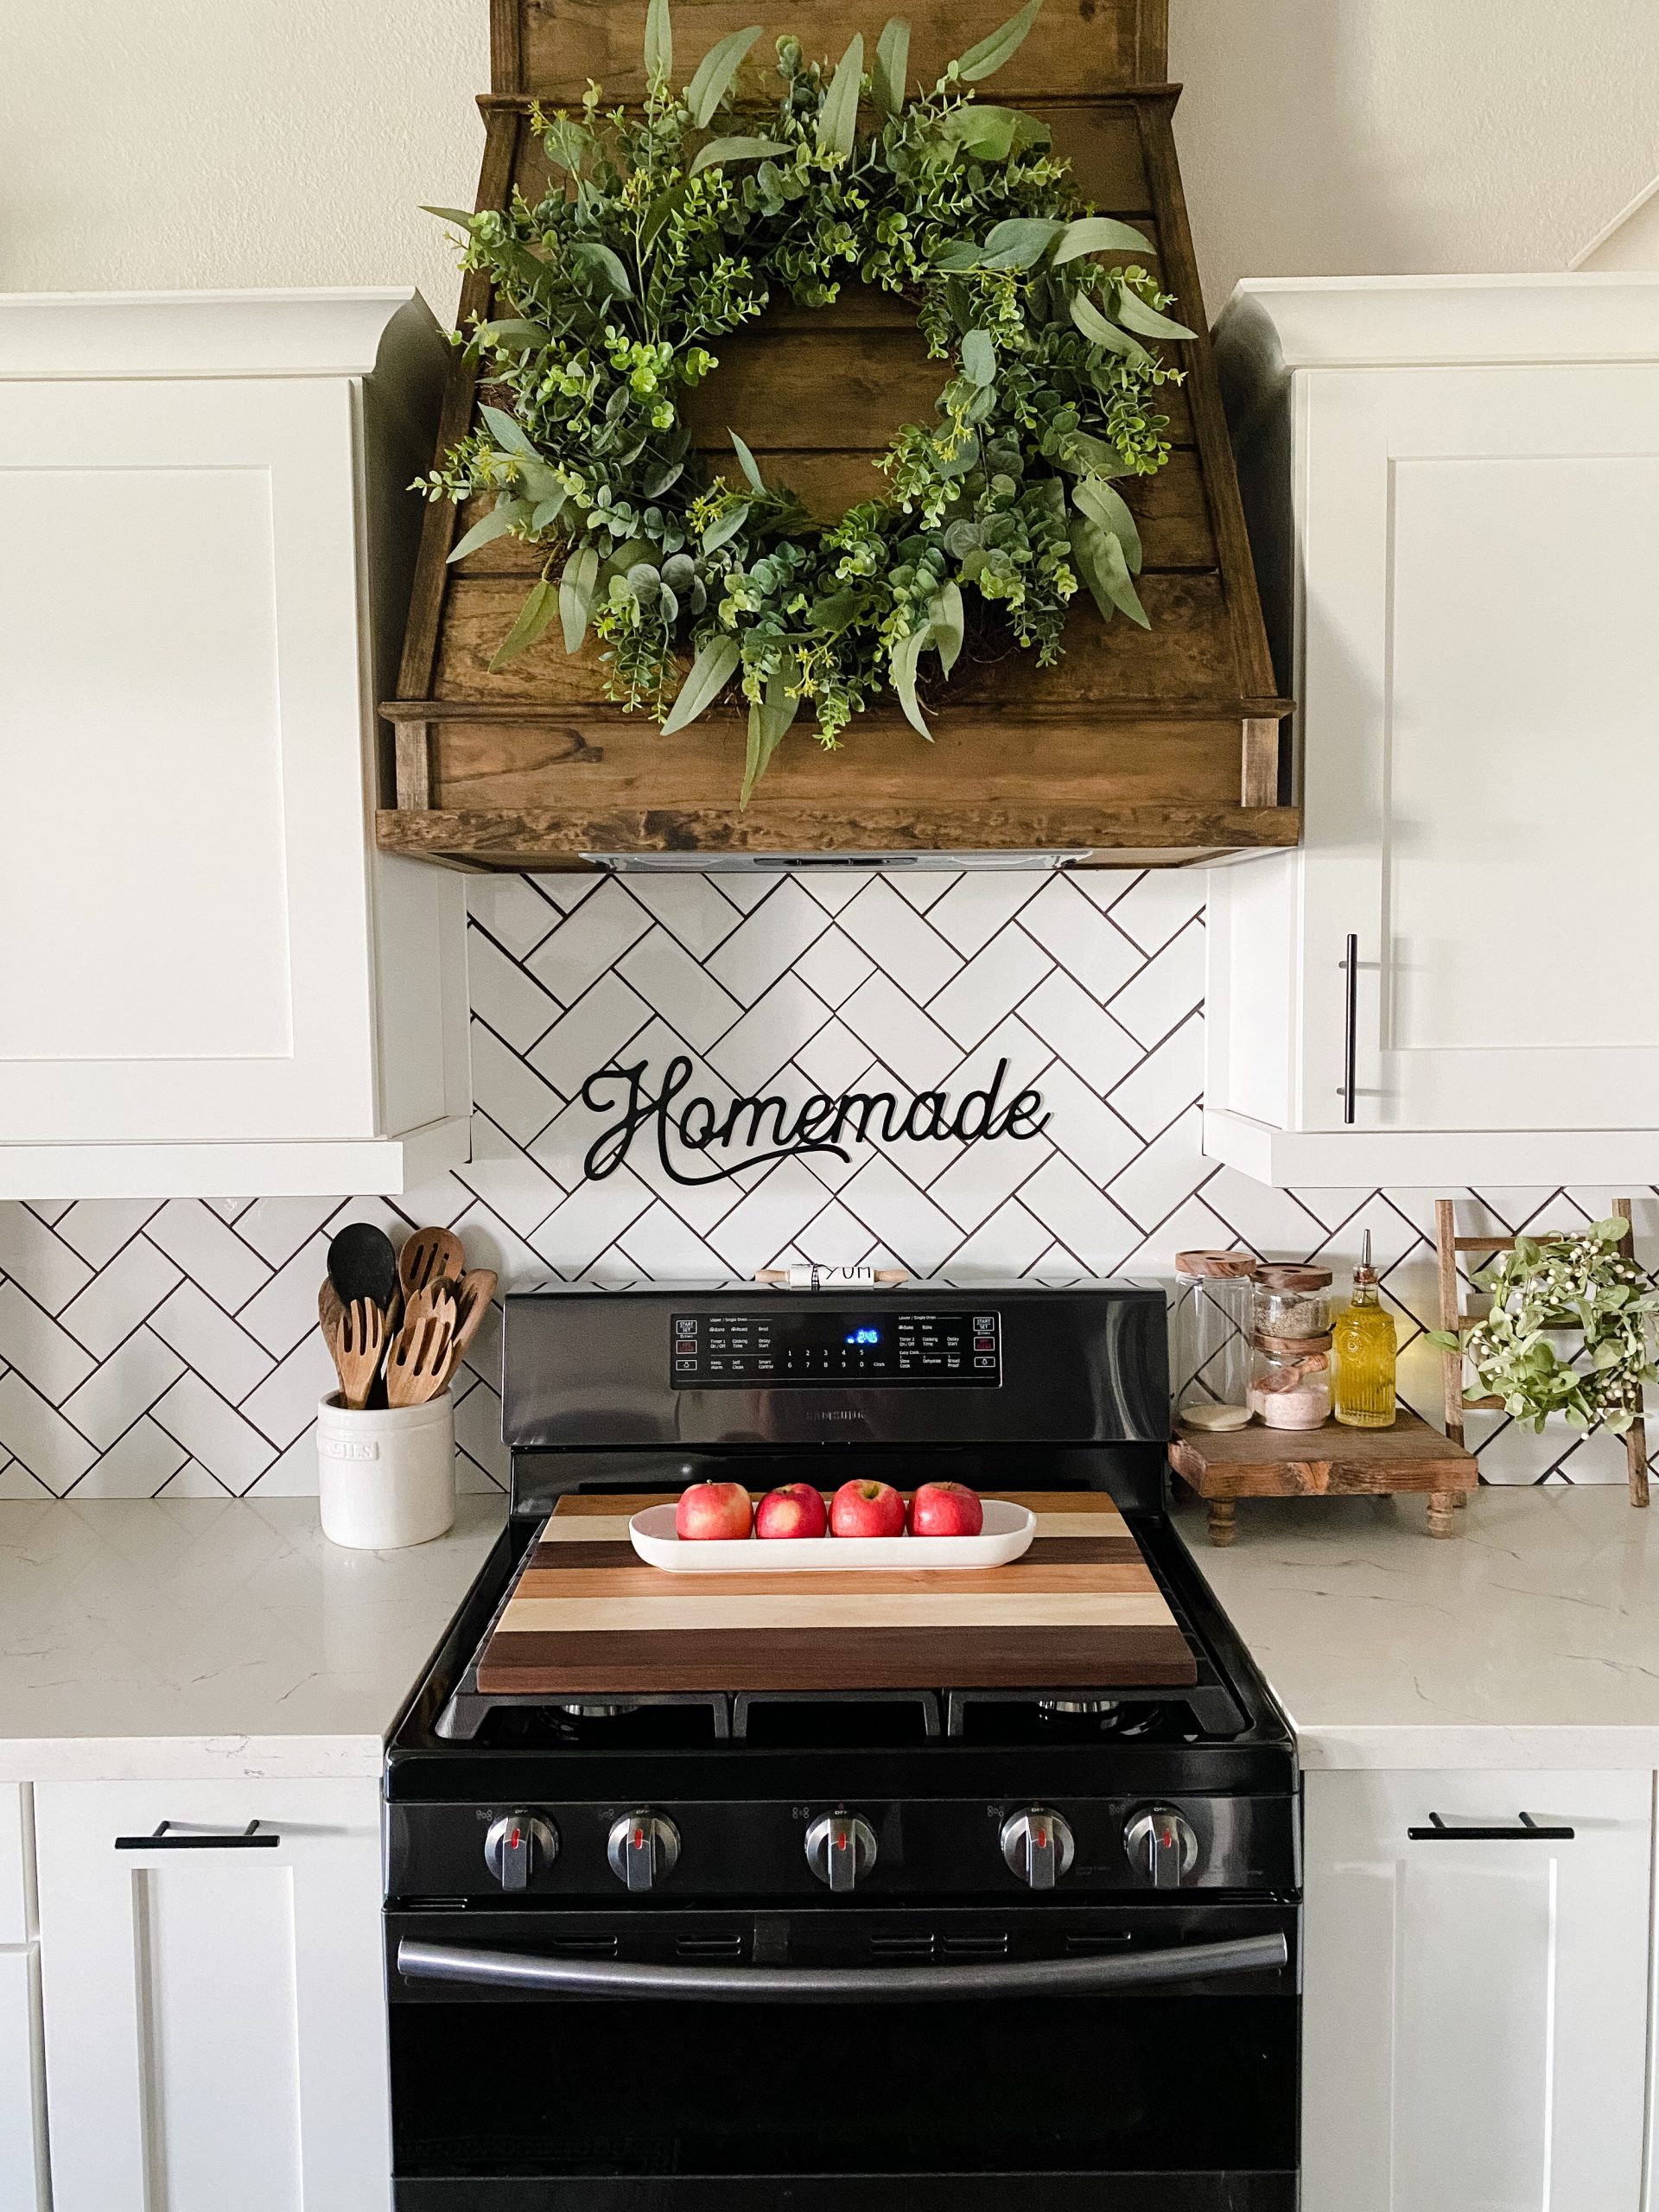
What do you think? Do you love it as much as I do? If you would like to see this tutorial in video form you can find it on my instagram here. If you have any questions or comments let me know in the comments below, would love to hear from you.
Jessie Thomas