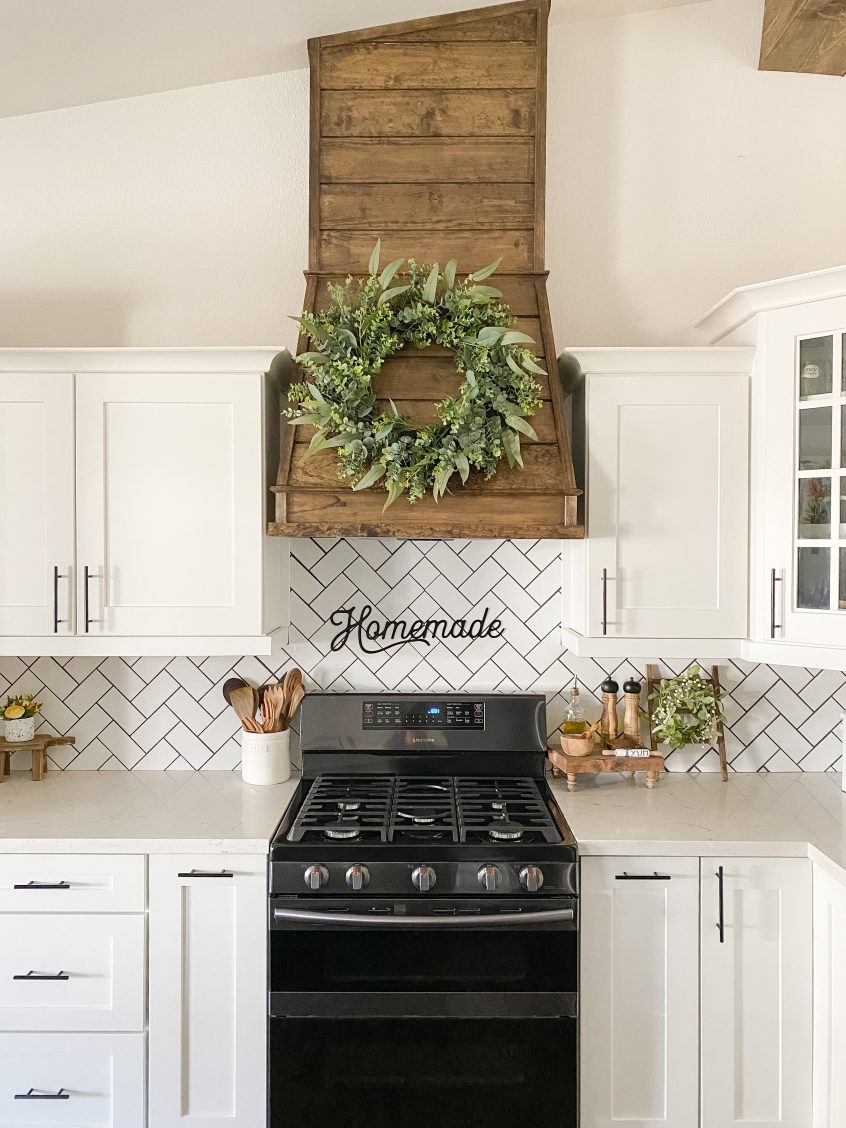
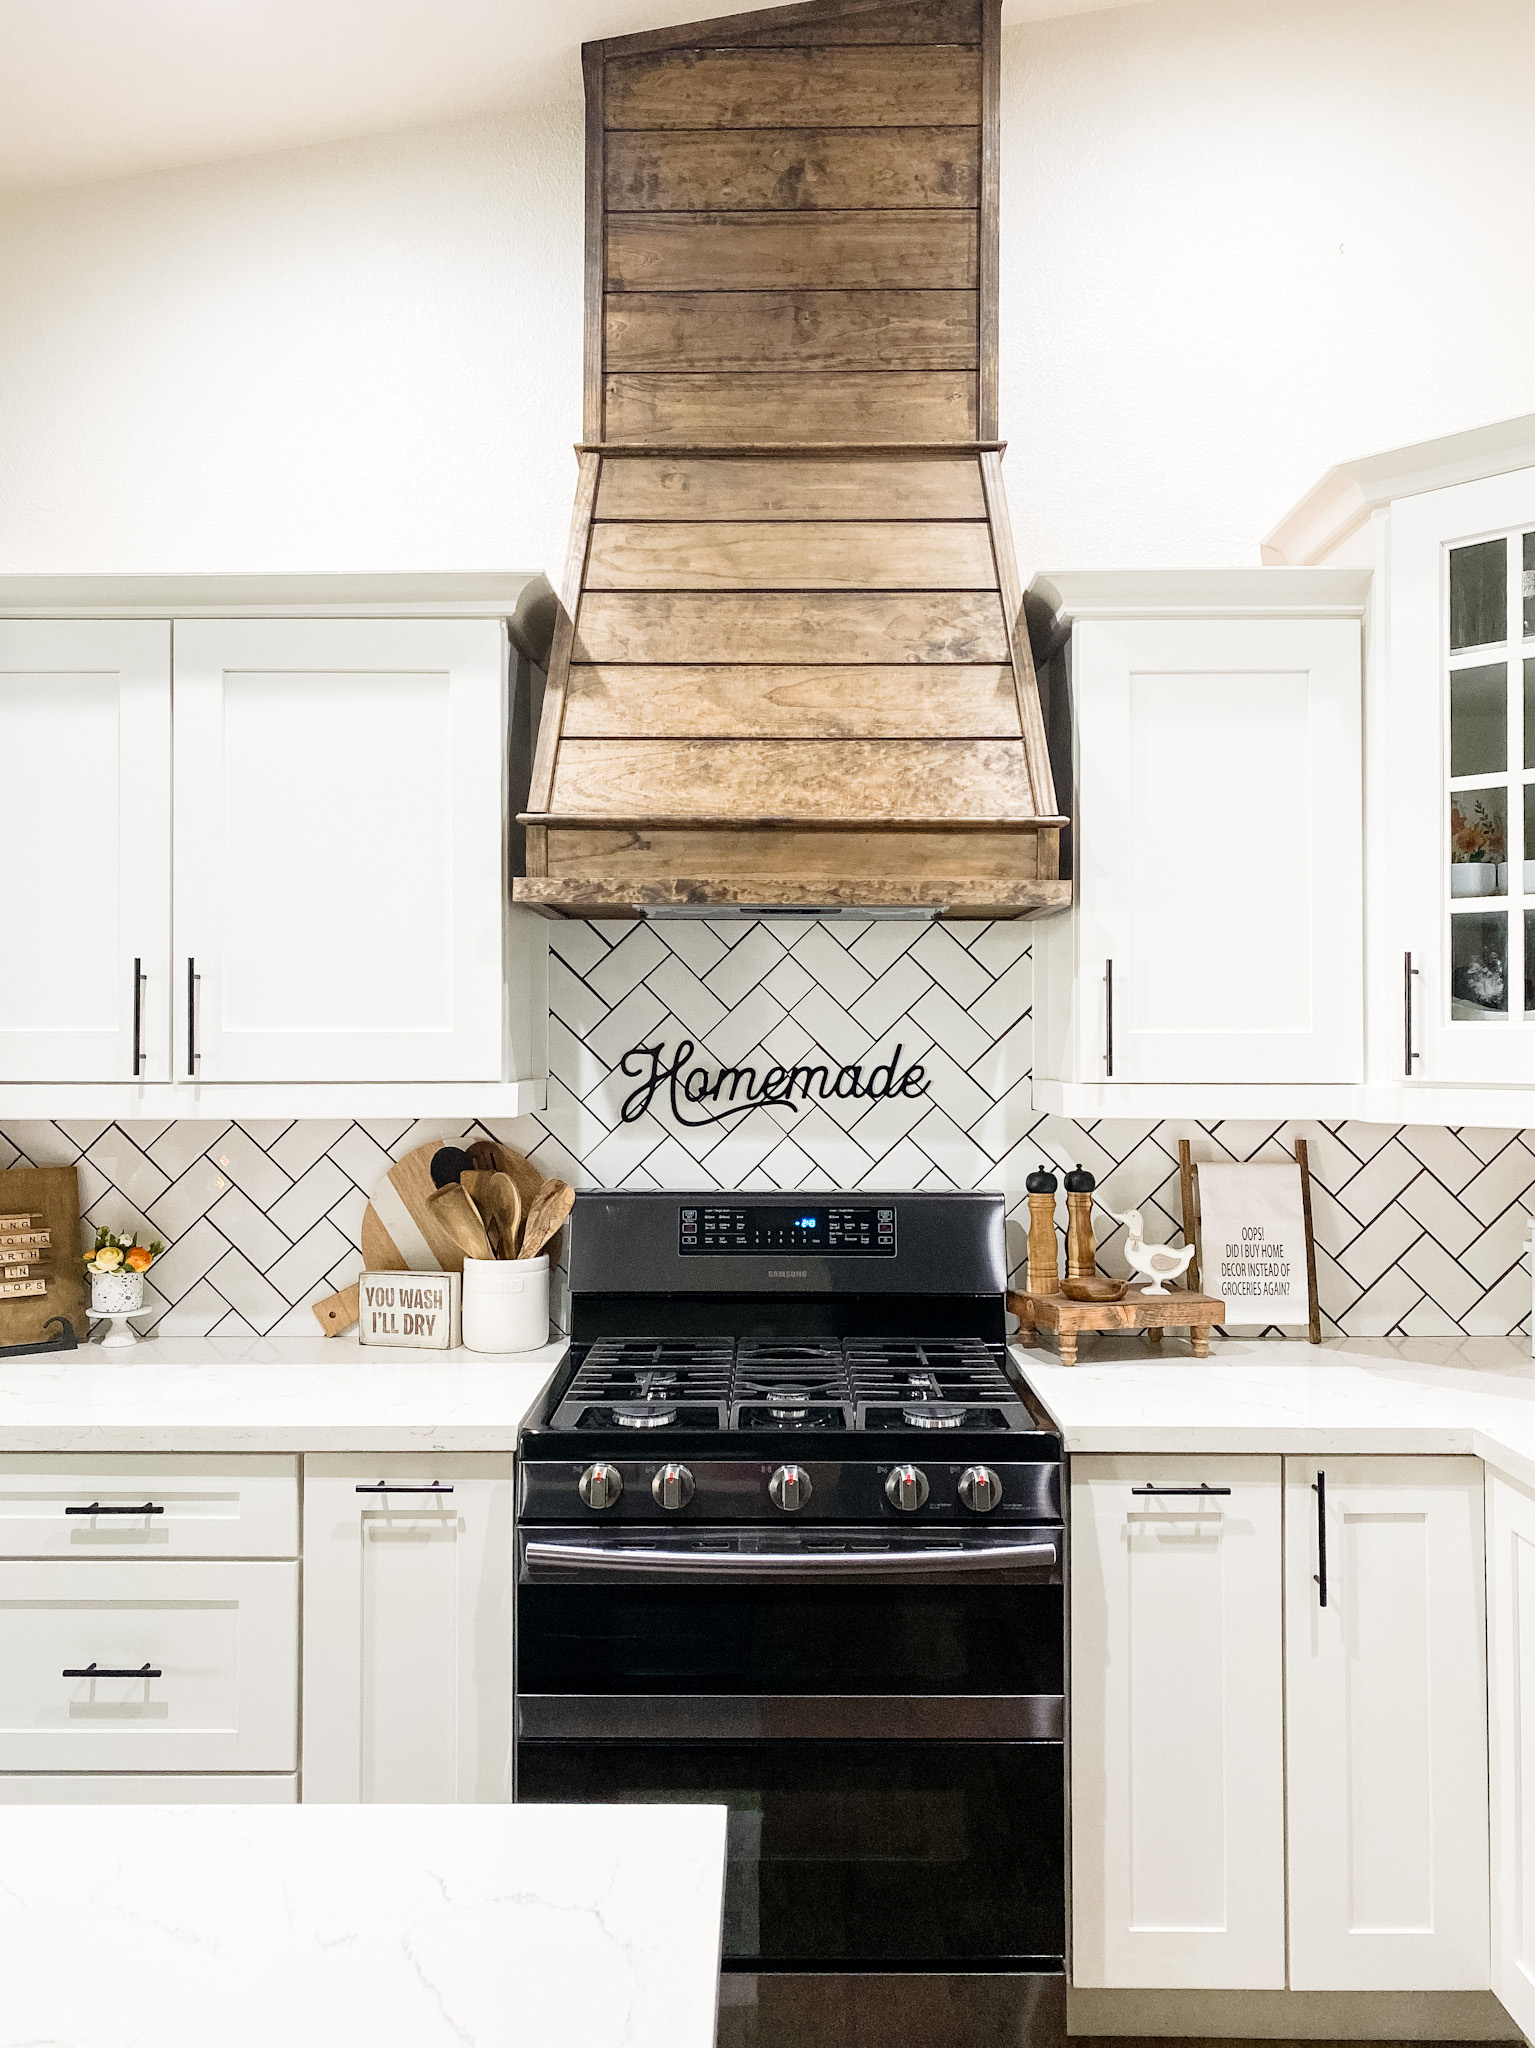
How we DIY’ed our wood vent hood

I love DIY’ing how to tutorials now. BUT…. I’m kicking myself in the butt for not making a proper tutorial on how we DIY’ed this modern farmhouse vent hood back in early 2019. We get asked questions all the time on how we did it. So I’m going to try my best to make one with the few pictures I do have. Being that this isn’t as detailed as most of my other tutorial feel free to leave a comment below with any questions you might have. We would be more then happy to help if you decide to DIY one of these yourself.
With all that being said, let’s get started!
Vent Hood Supplies:
- 6- 6″x96″x3/4 pine
2. 1-12’x48″ pine
3. 2- 2″x96″x3/4 pine
4. 7/8″x96″ decorative trim of choice
5. Favorite wood stain ( this is dark walnut)
6. wood conditioner (use this before applying the stain)
6. Wood glue
7. Vent
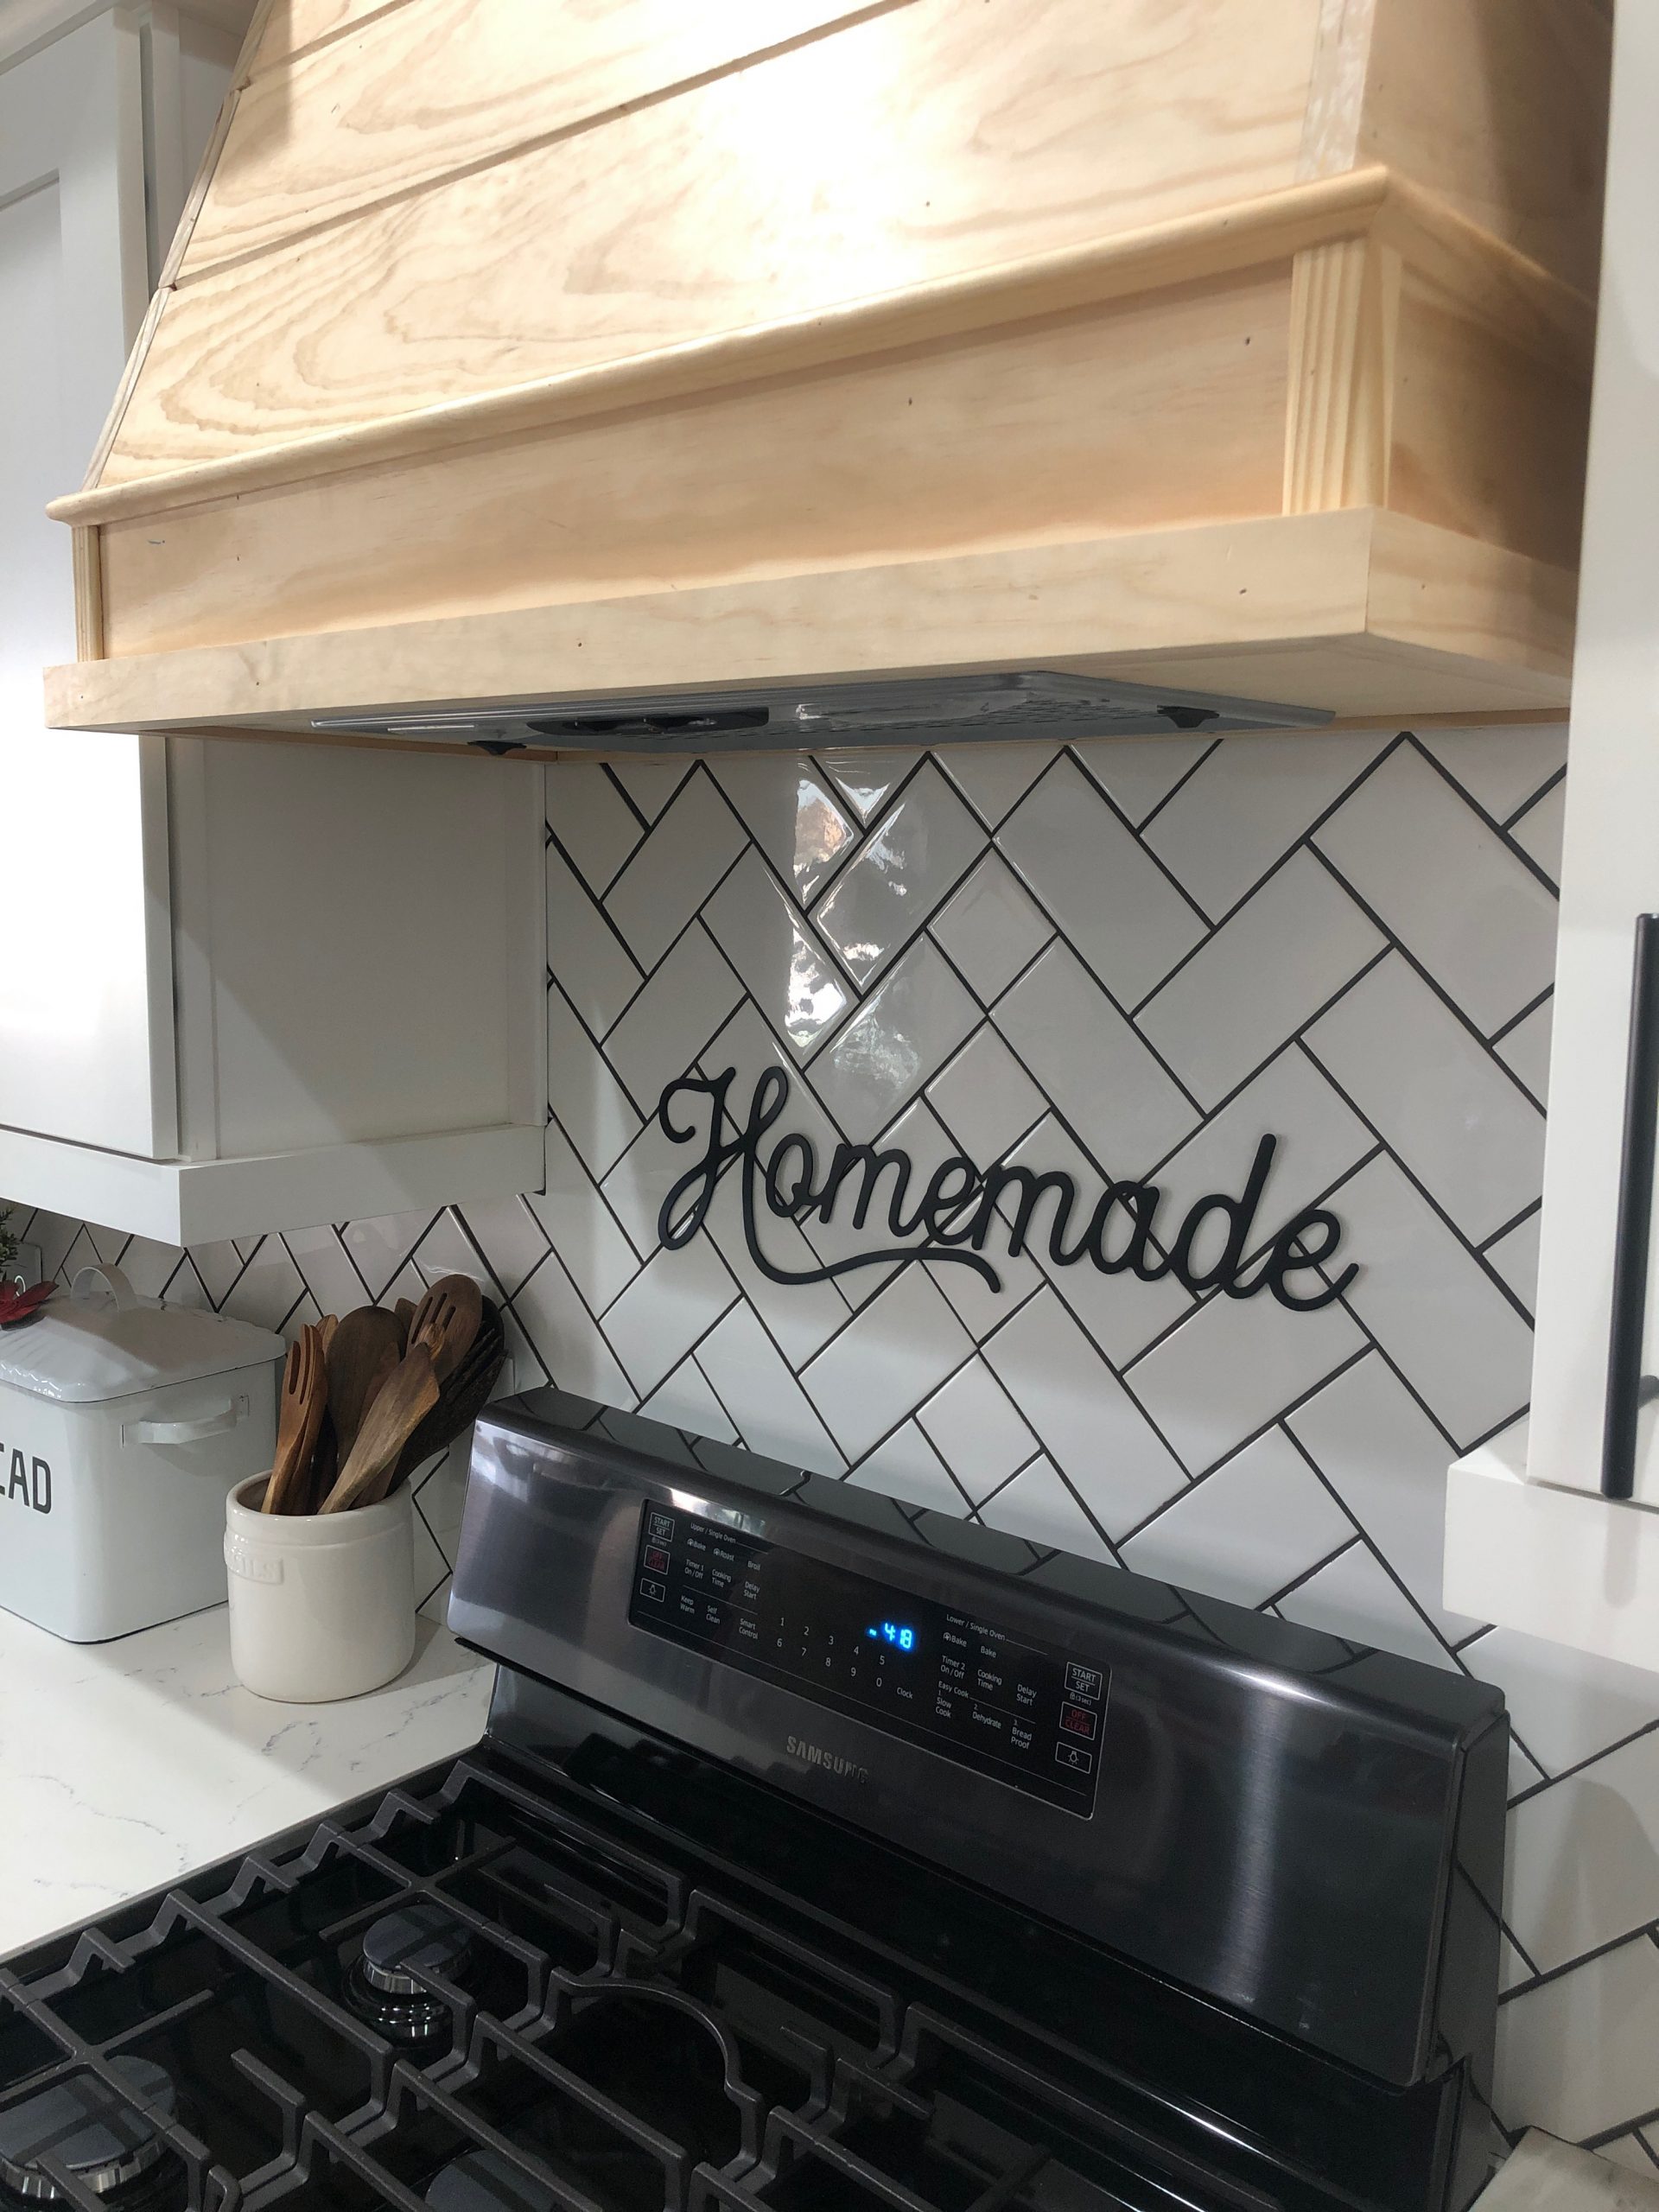
8. “homemade” sign (optional but I love mine)
Tools:
- Nail gun with 2″ nails
- Electric screw driver
- Level
- Square angle tool
This was the final thing we had to DIY in our kitchen remodel. If you’re interested, I have documented our whole home renovation process starting with my very first blog post. You can read it here. We DIY’ed 90% of our house ourselves. Most of the projects we had never done before and we just learned along the way. We even took out a closet! That was fun!
This does take a quite a bit of skill. I know, me personally, I probably could’t have done it on my own. My husband used to work for a cabinet company when he was in his 20’s. The skills he learn from that job have really come in handy. We save so much money on these DIY projects because of this. BUT, I do believe between good quality blog posts and YouTube videos you can do just about anything. It just takes a little bit of research.
How to:
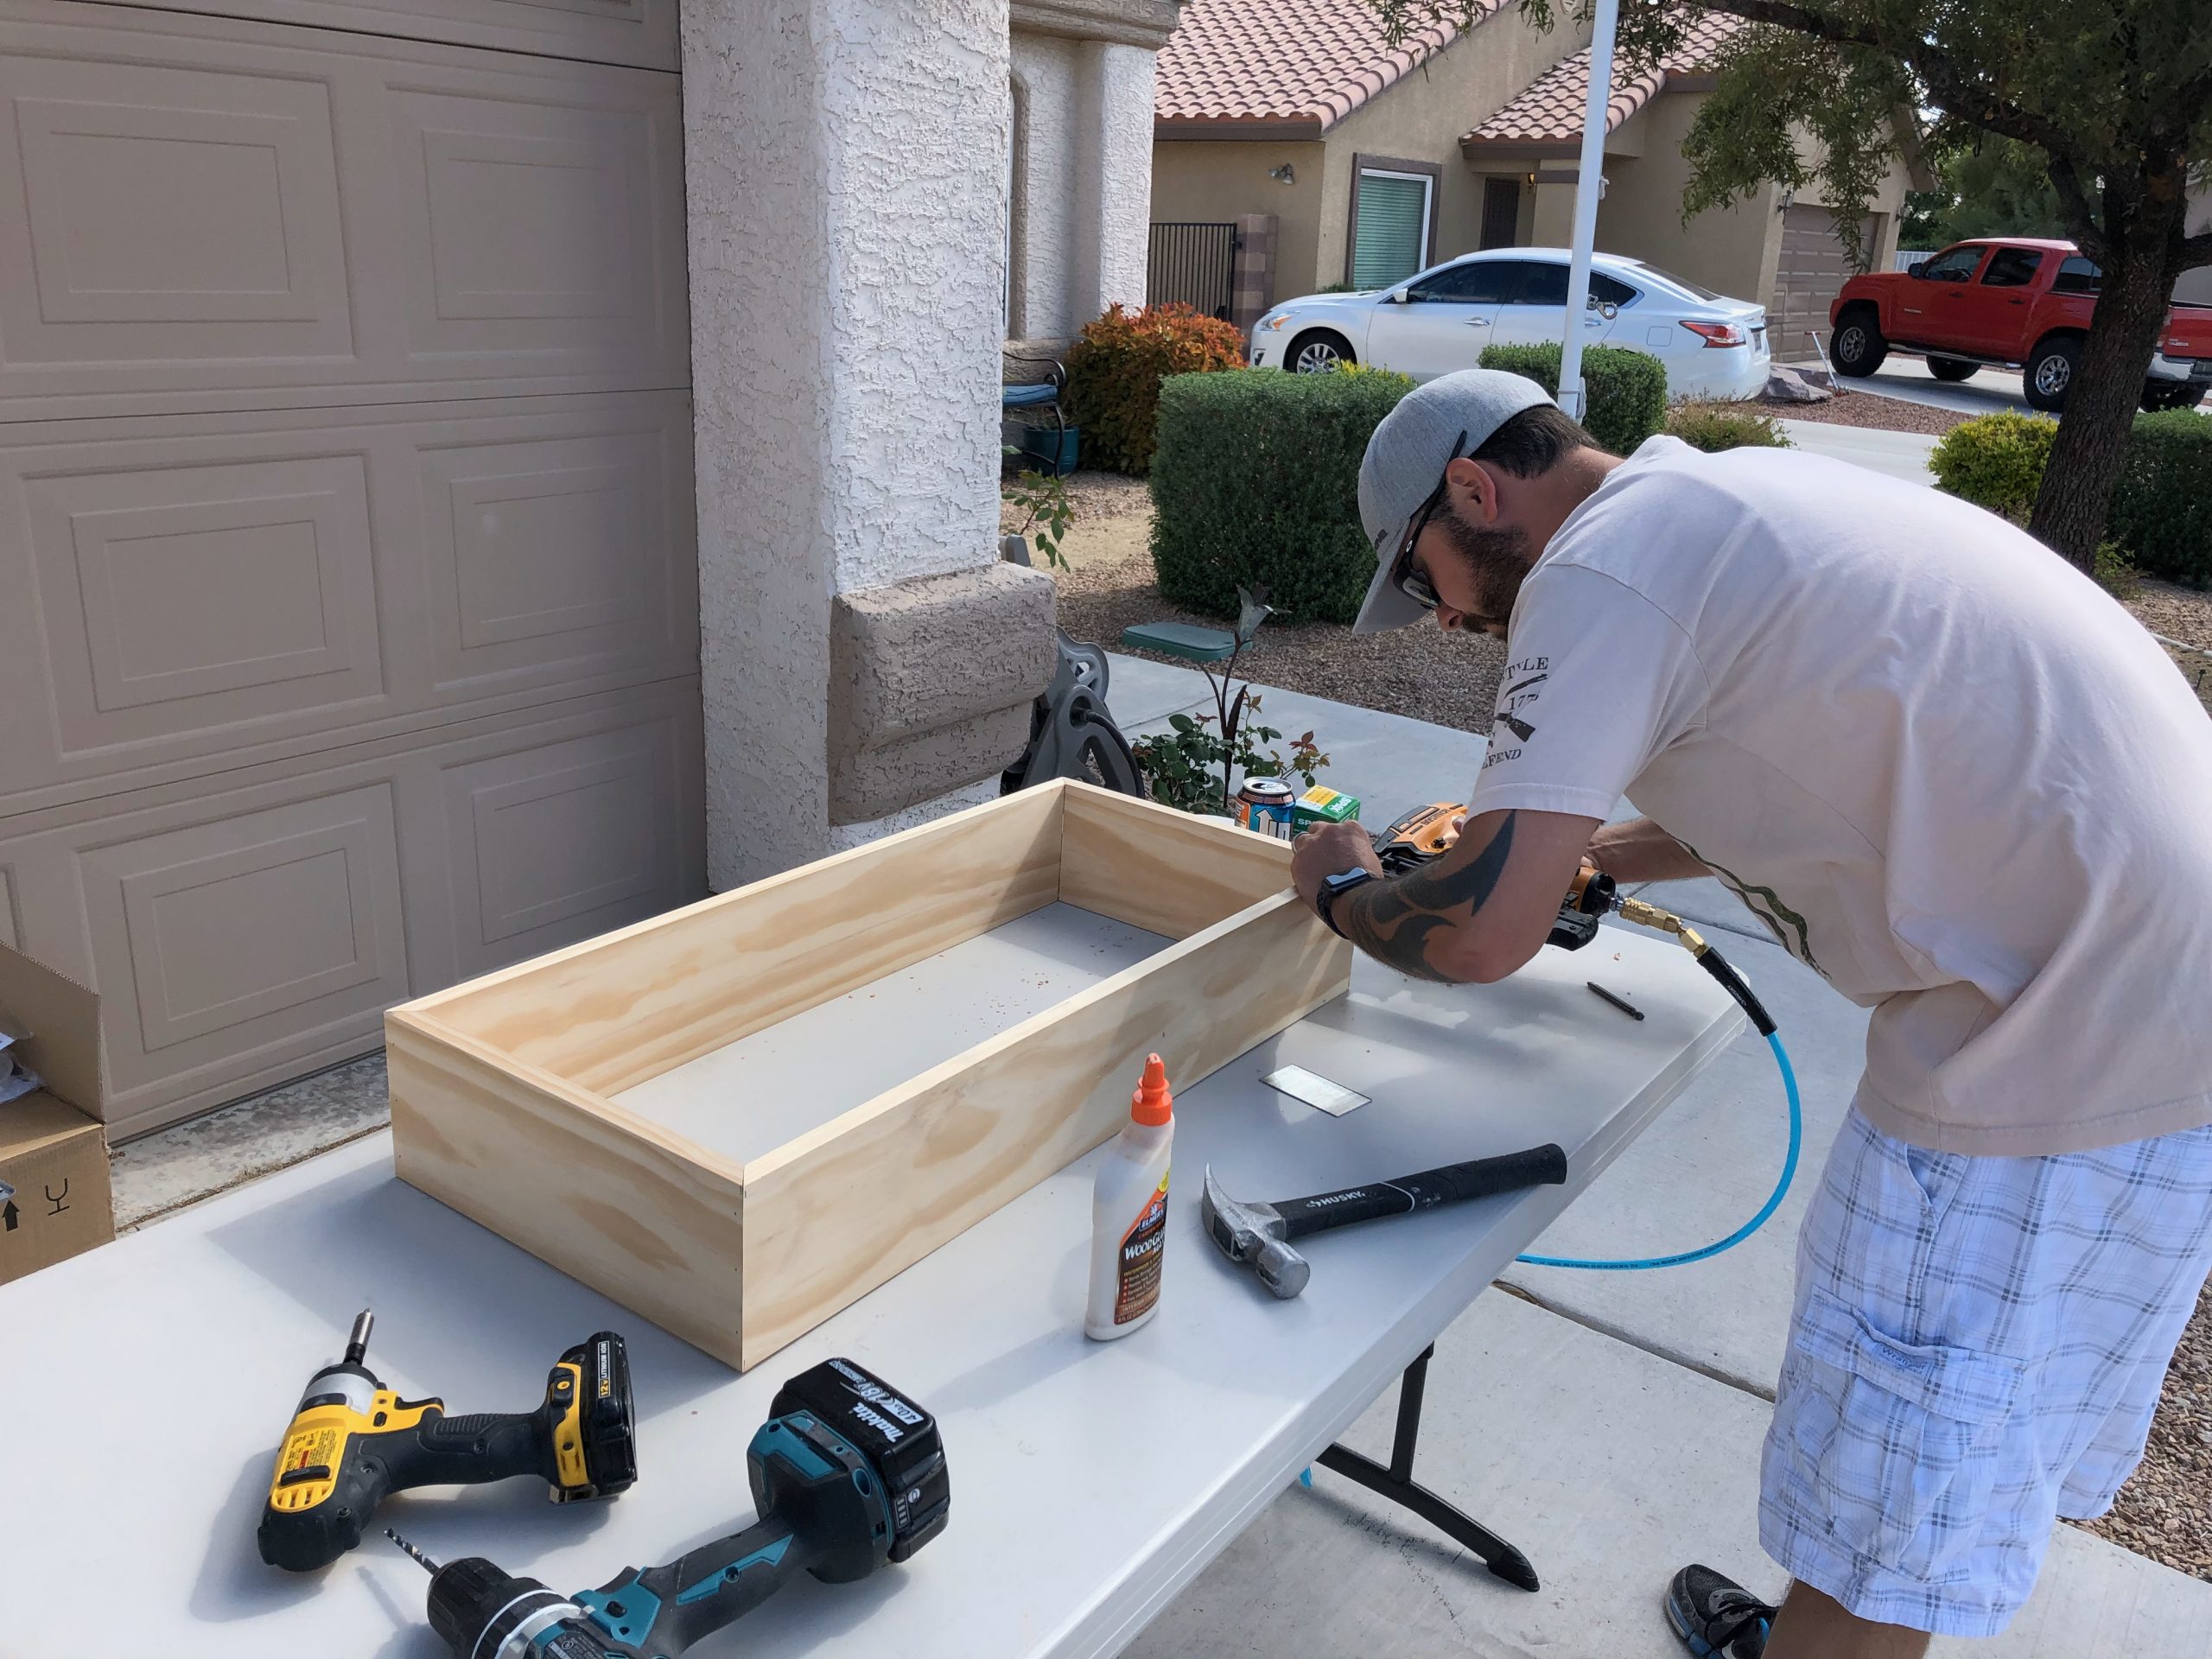
He first started making the frame. In order to have a seamless edge he mitered this base at a 45° angle then using a nail gun secured the base together. Make sure you also use wood glue. Glue is 10X more stronger than the nails. This in insure it never comes apart.
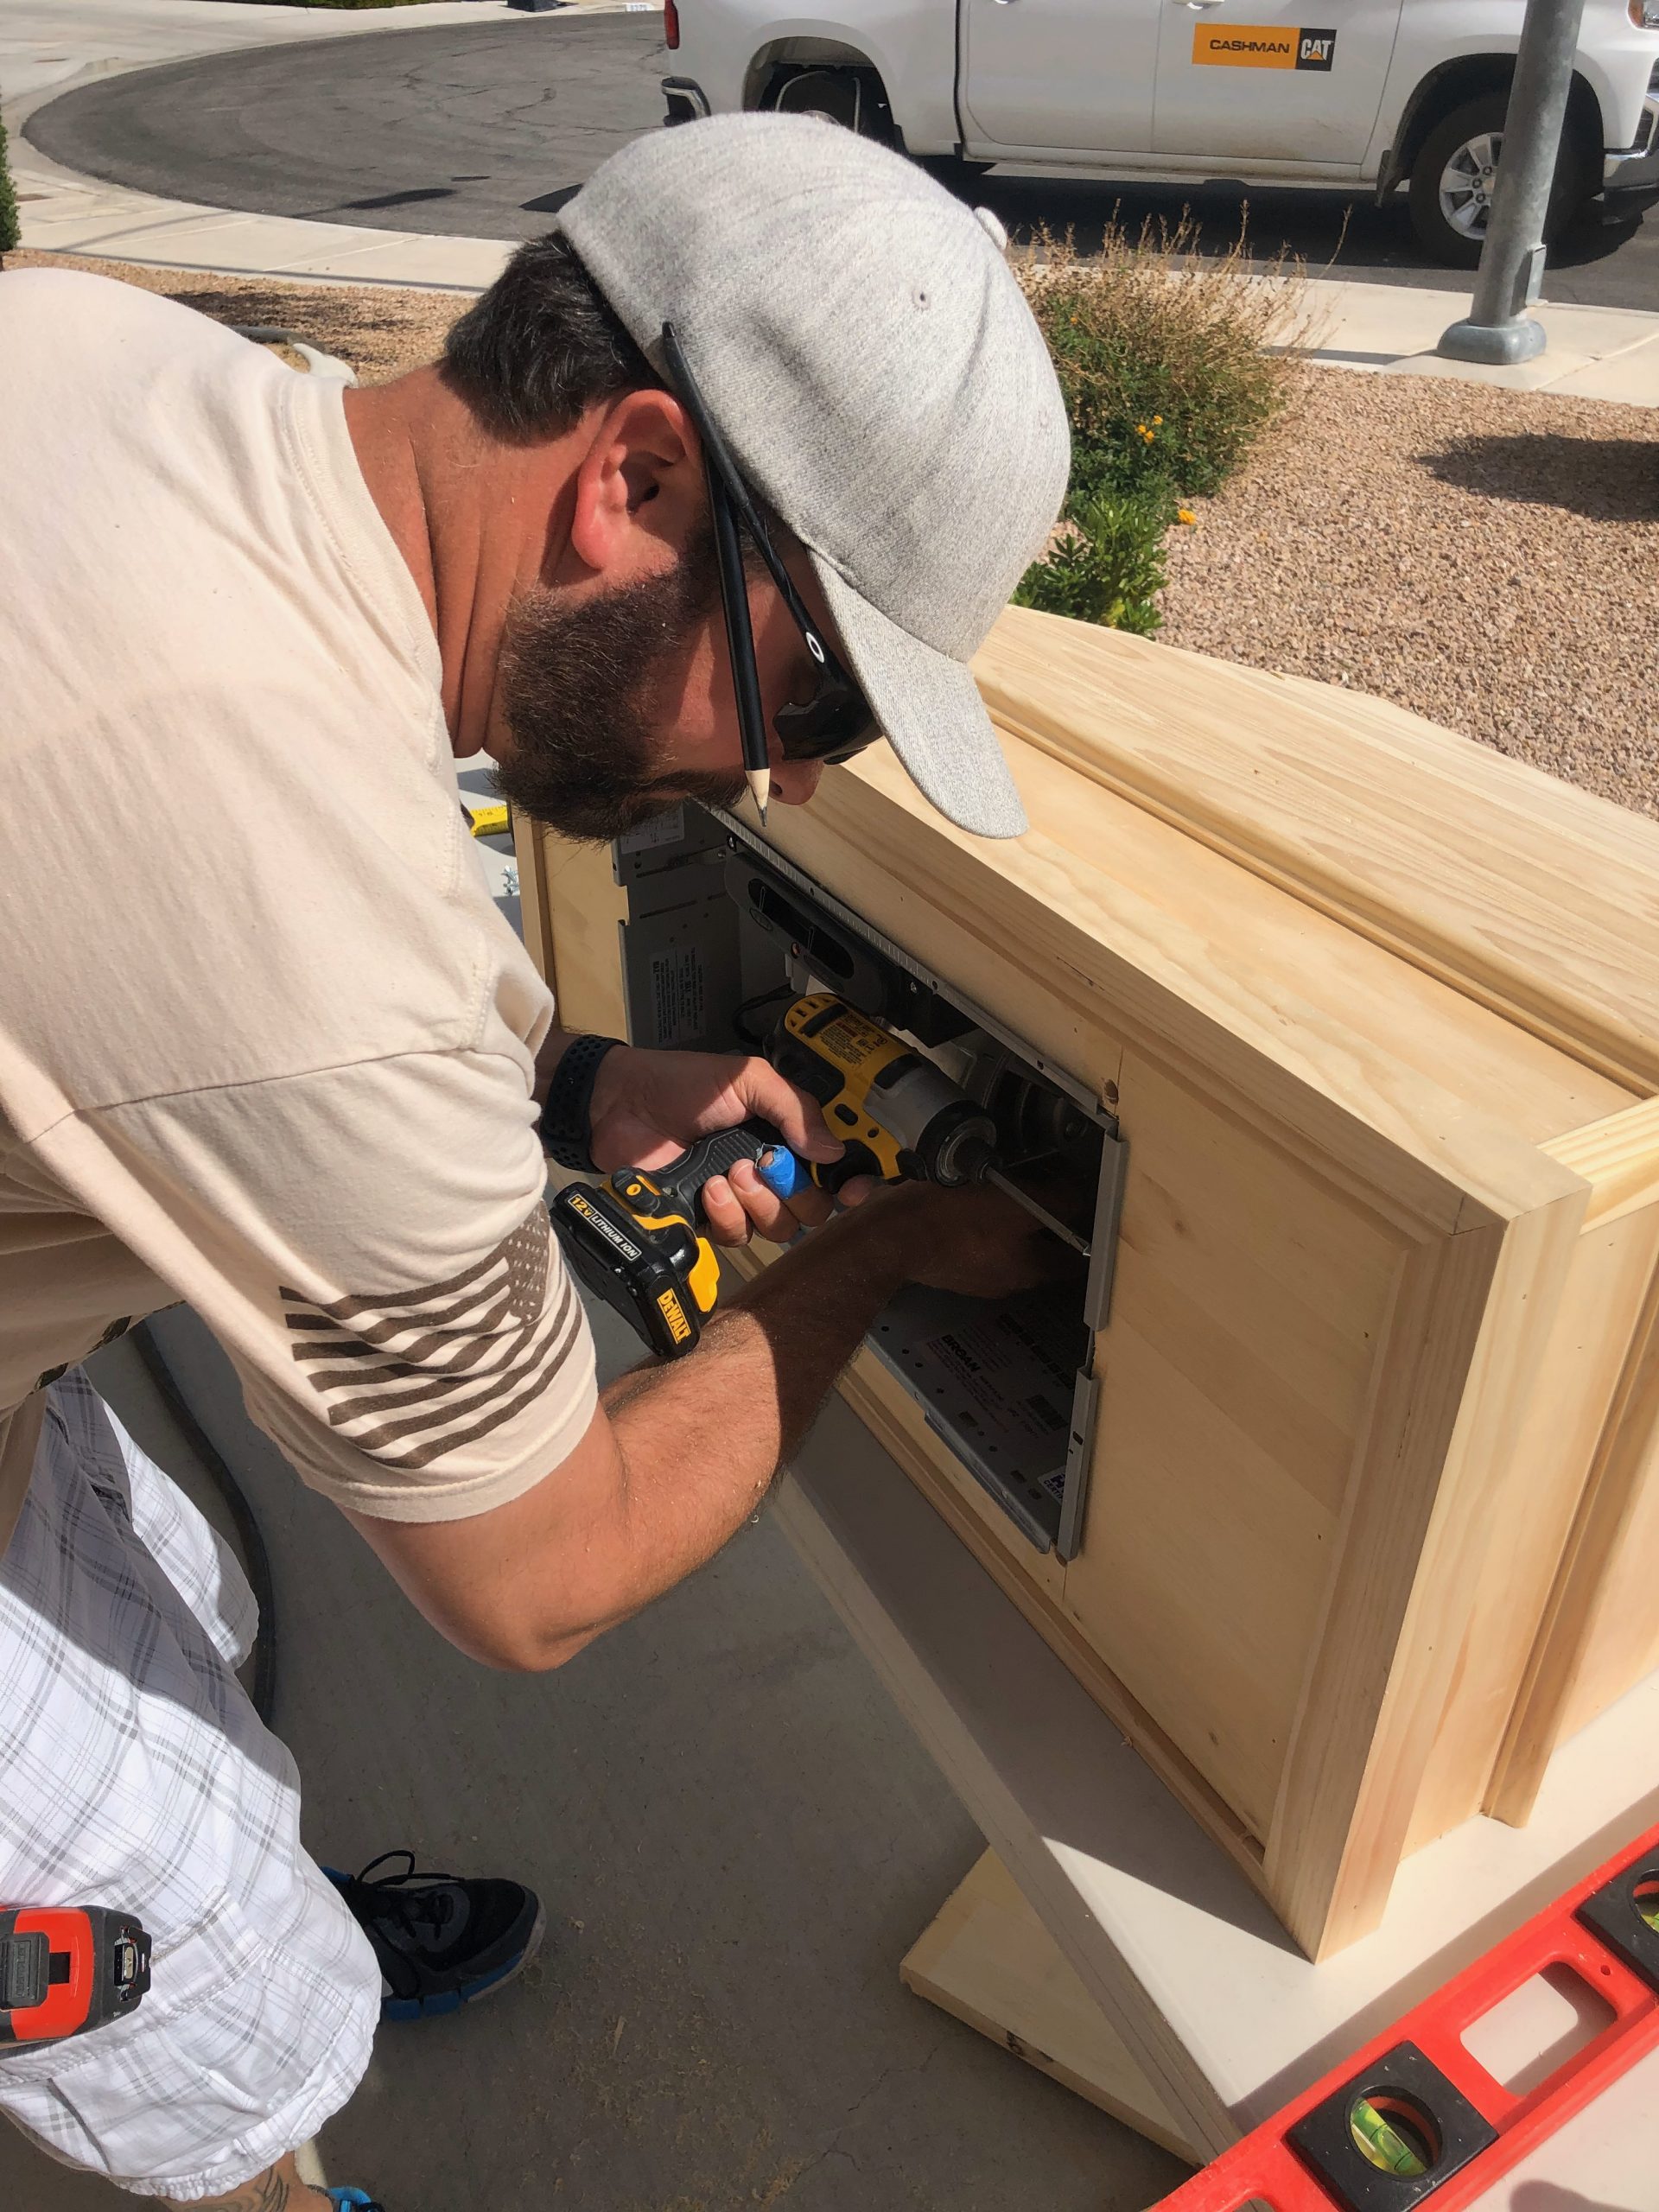
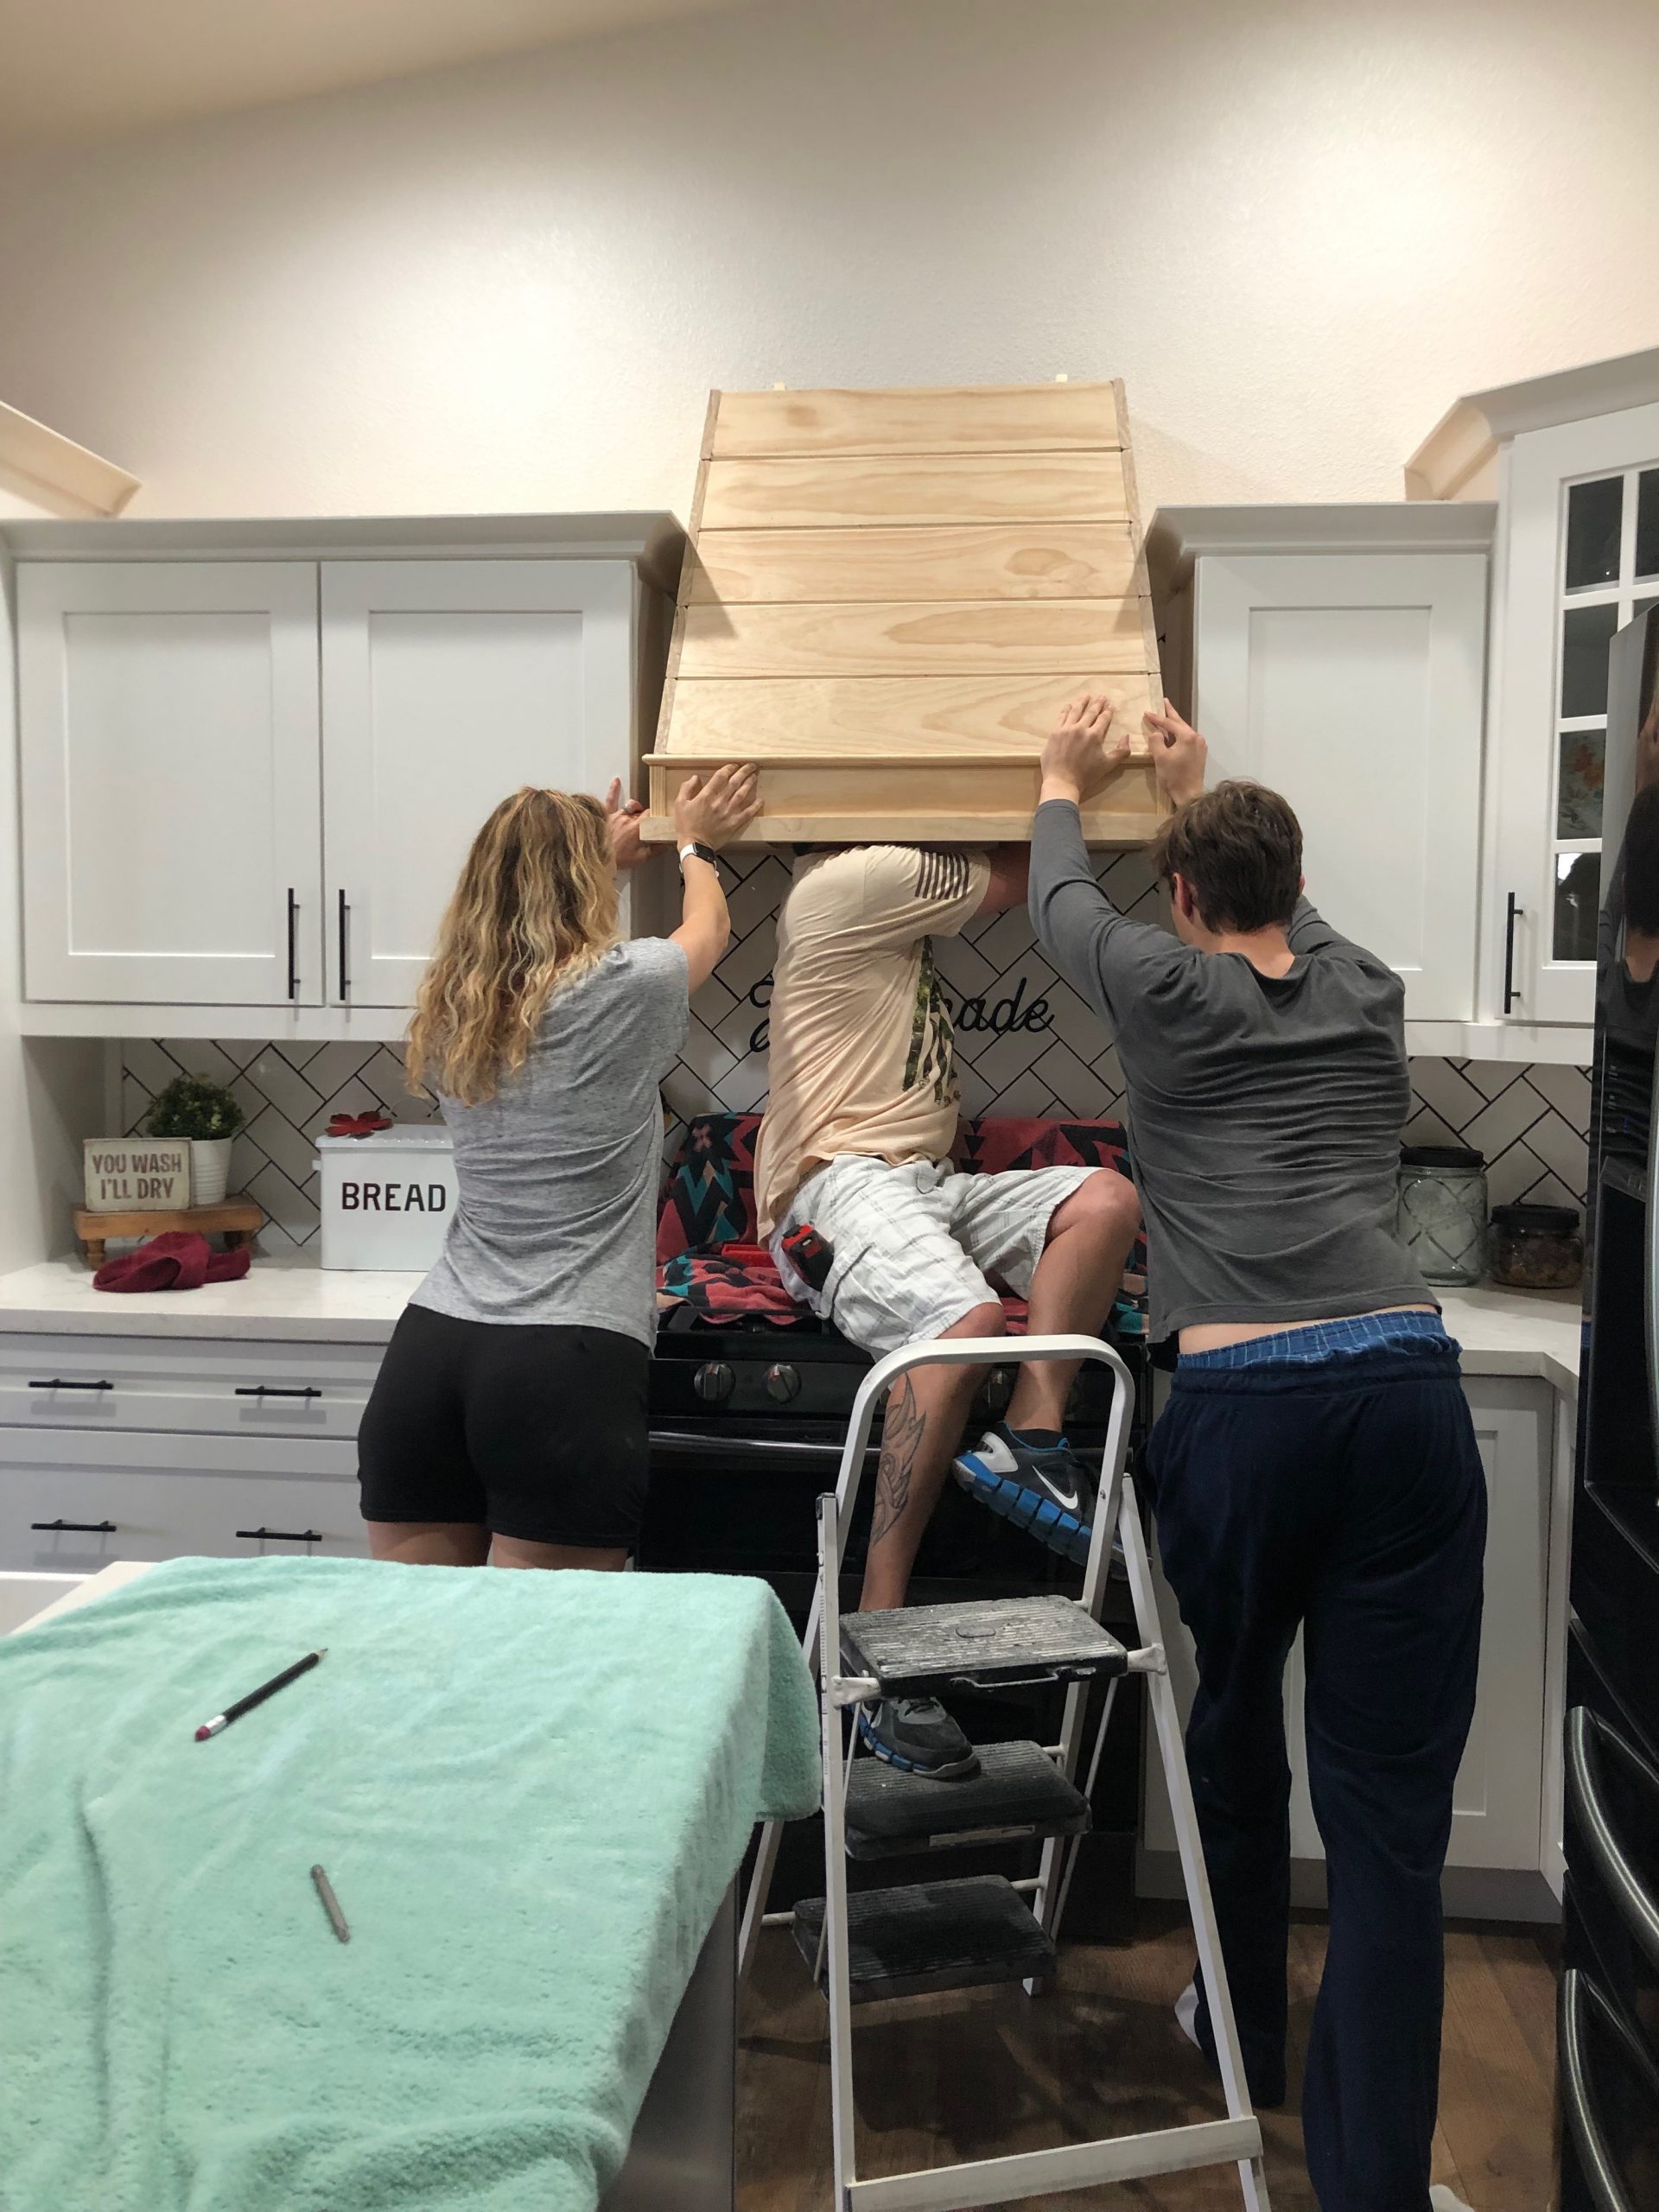
So this is the tricky part. In the picture below the hood is halfway built. I’m hoping with this angle you can get a better understanding how how he built it.
He then built a frame 42″ tall with a 7° pitch. After that he cut the slats with mitered edges and he routed the edges to make the wood look like shiplap for the front and the sides until he got to 42 inches tall. He installed a 1″ thick board at the bottom of the hood. Then cut the opening for the hood to install it. He made sure the vent fit but then took it out to install the wood frame in the house.
Once this first section was built we brought it into the kitchen to mount it to the wall using 2 1/2″ wood screws. He placed it 36″ from the range. He used a piece of scrap wood (cleat) against the back of the hood to help secure it and making sure to hit a stud.
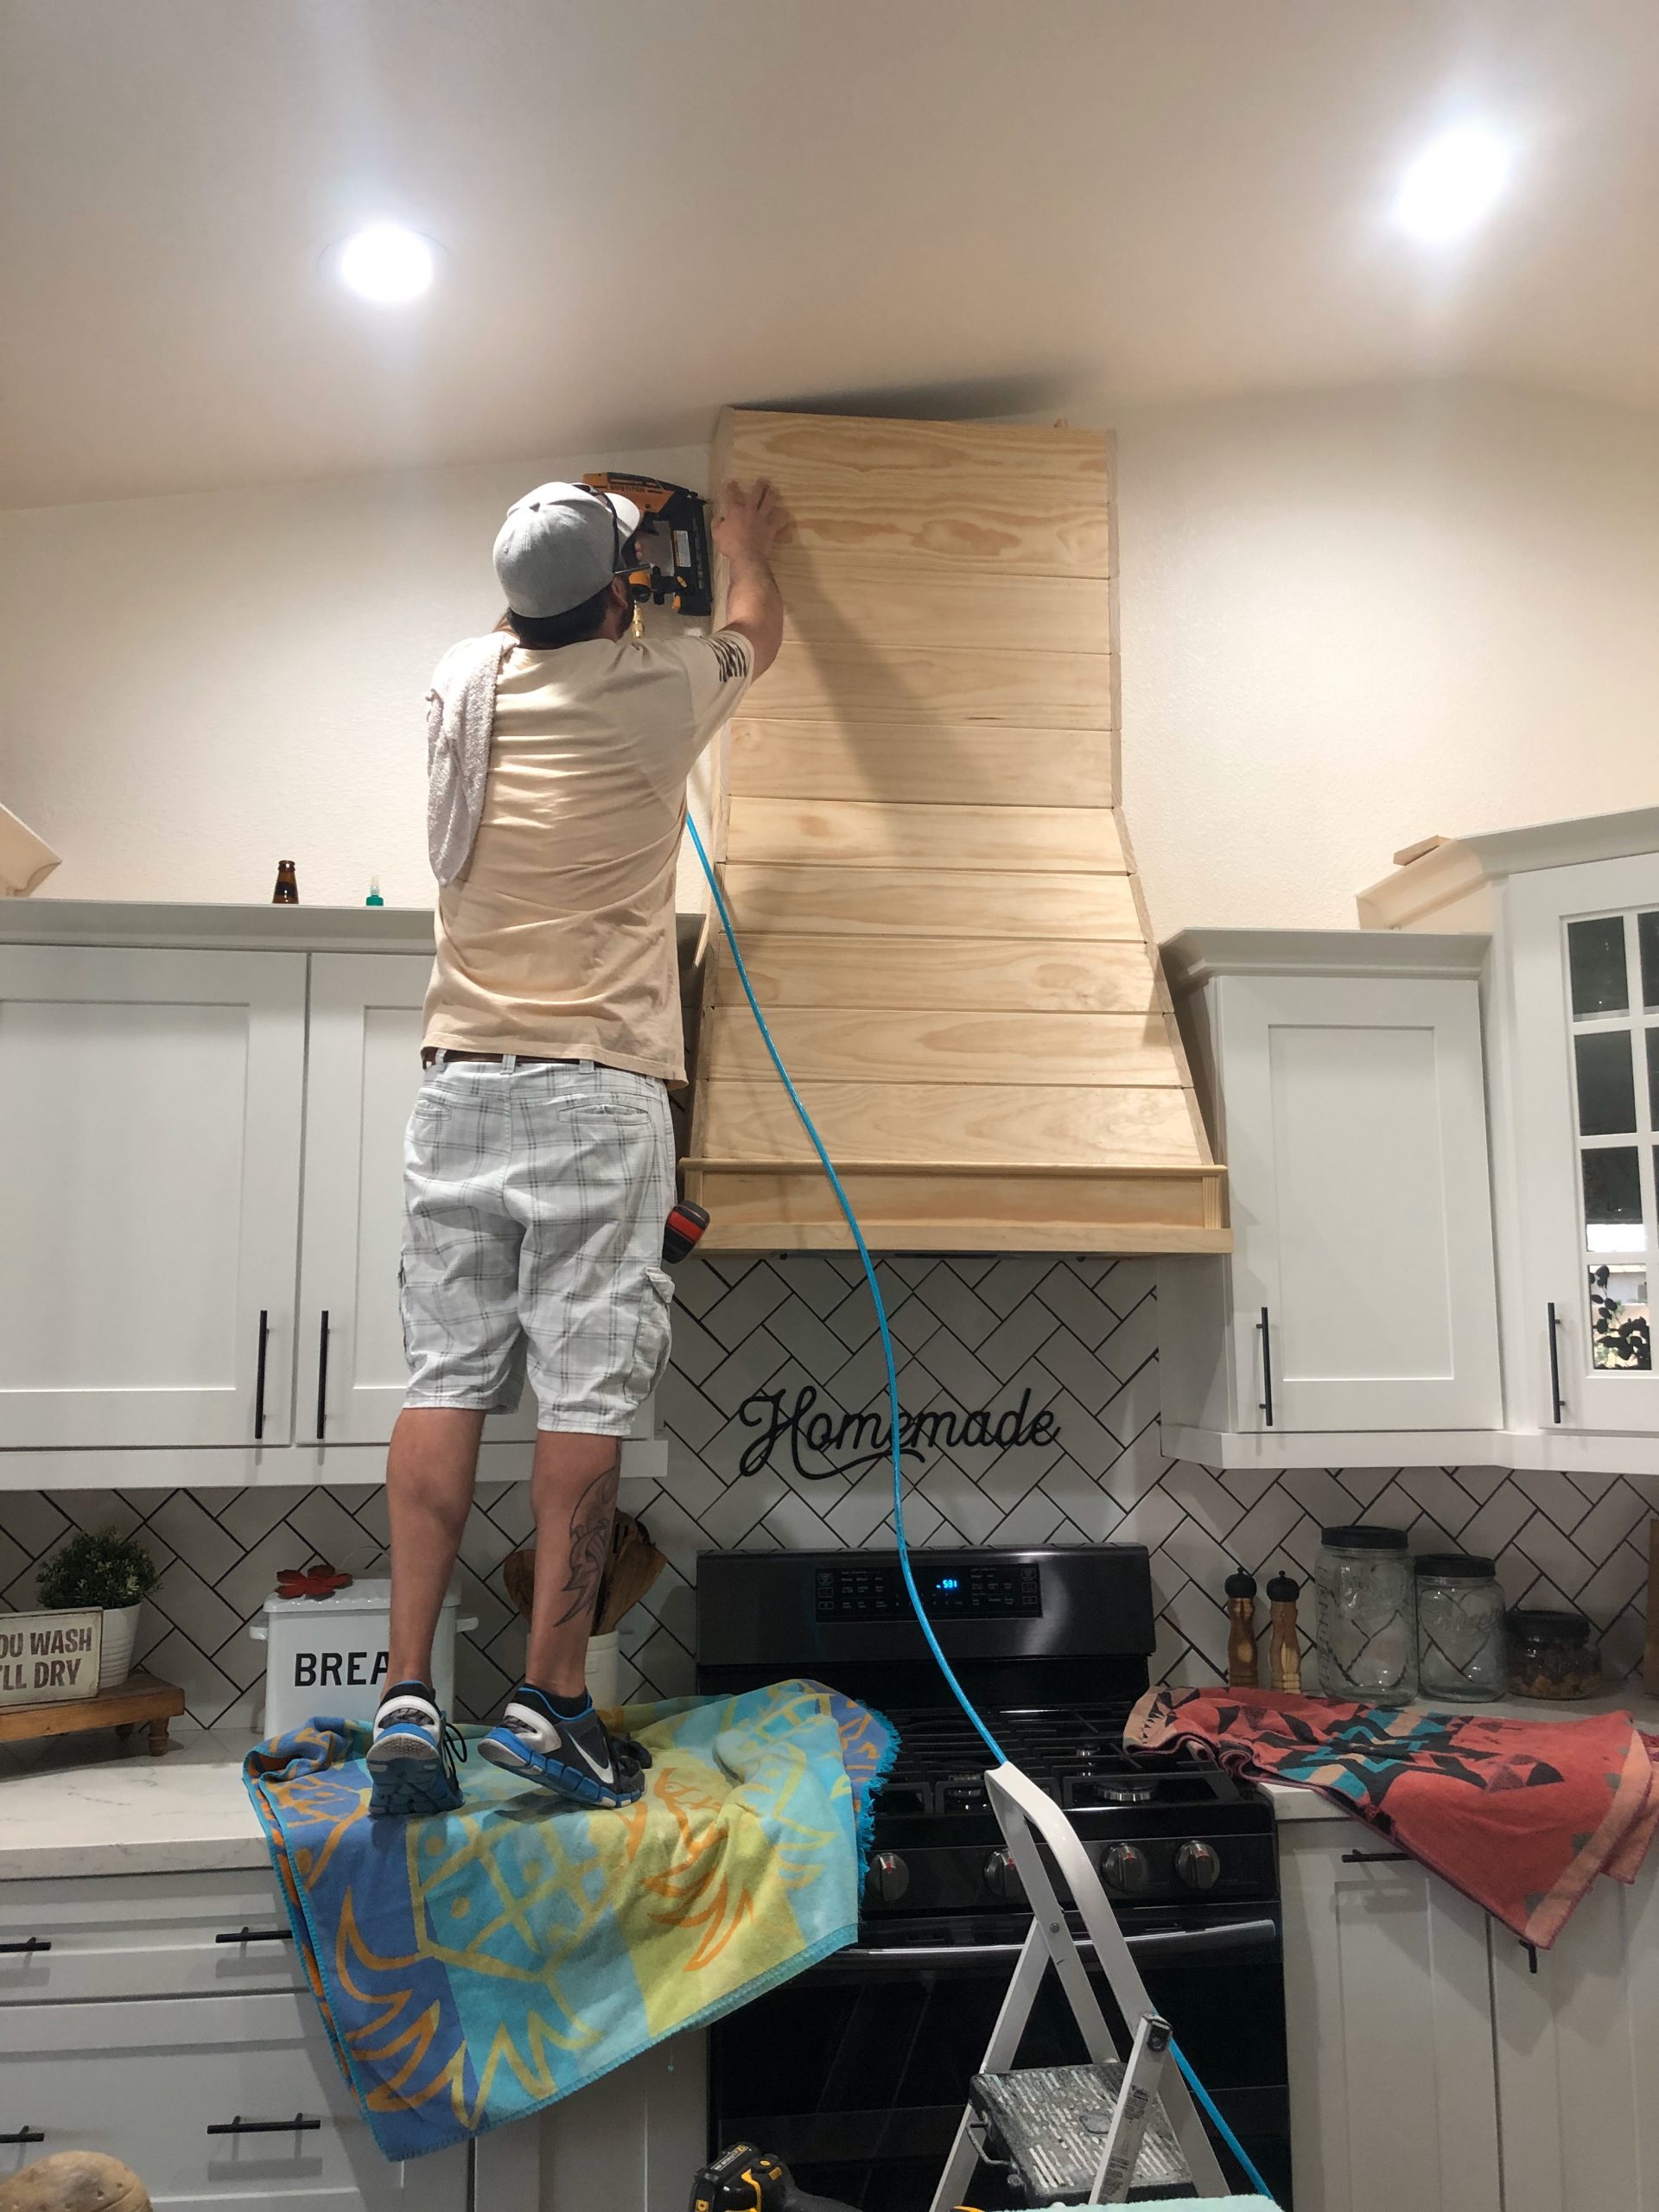
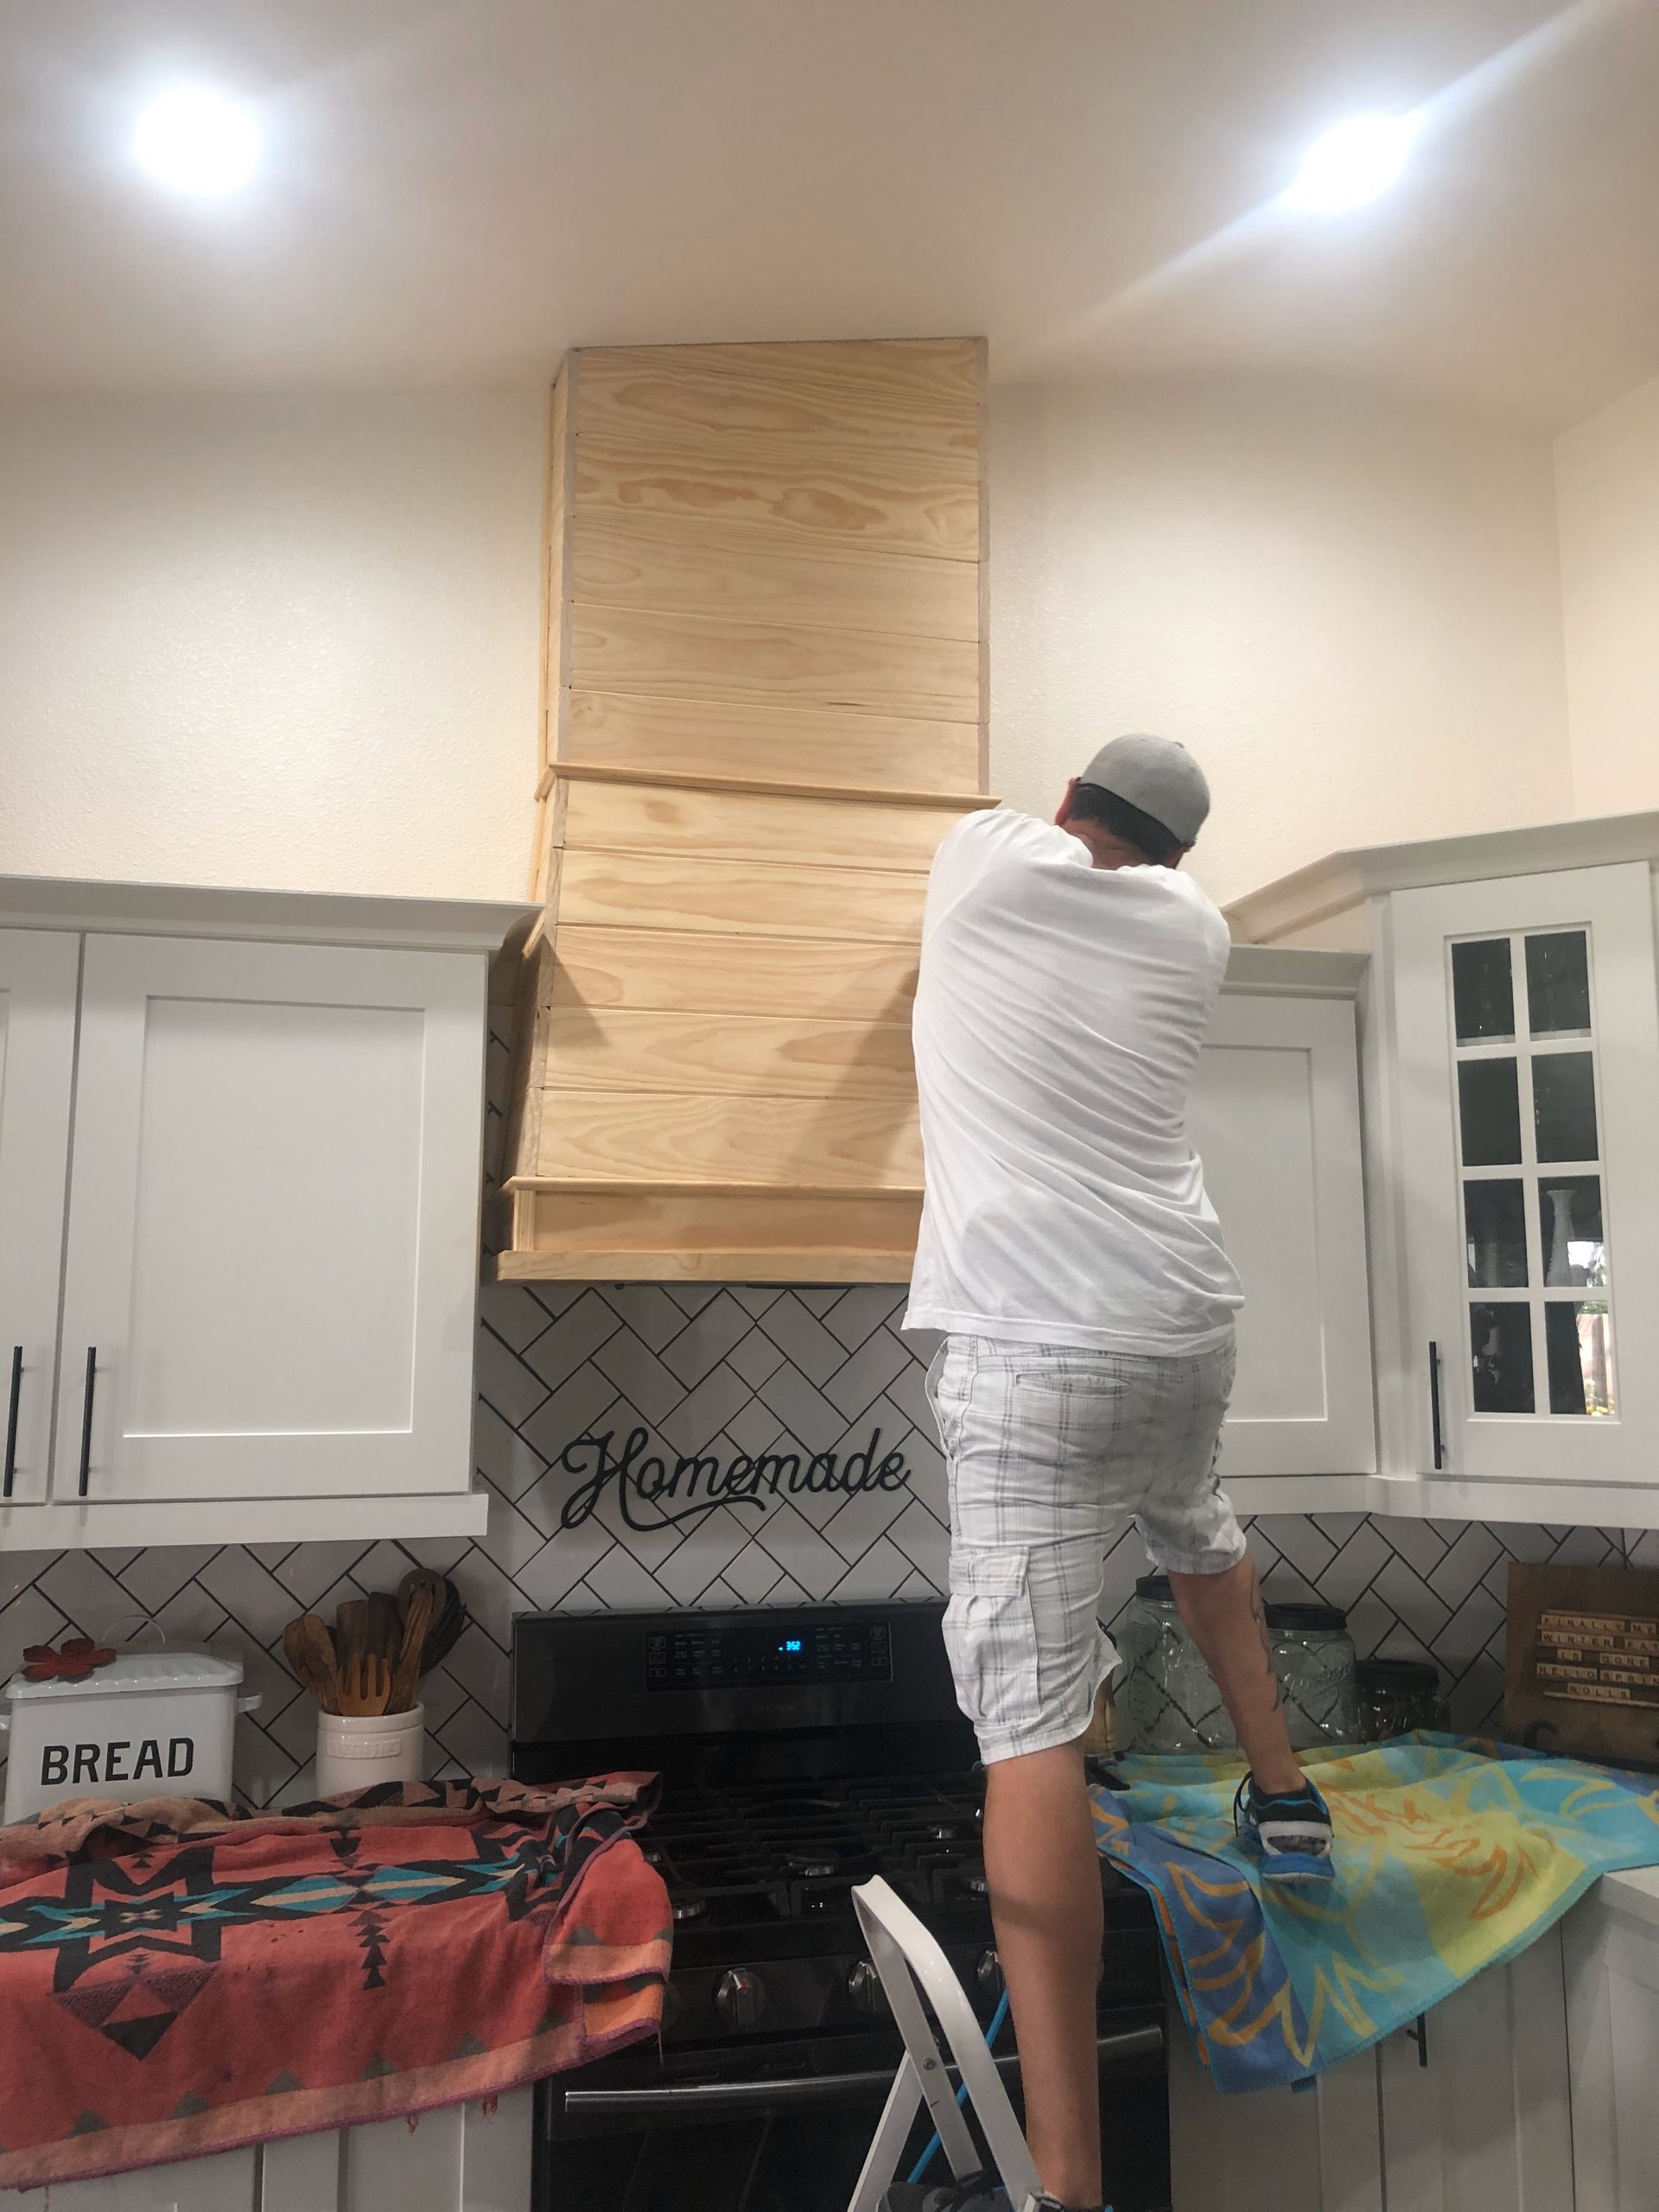
From there he added more inside frame to be able to add more shiplap boards all the way to the top. The final board did have to be cut at an angle because of the angled roof. He used a square angle tool to achieve this and to make sure the angle was perfect.
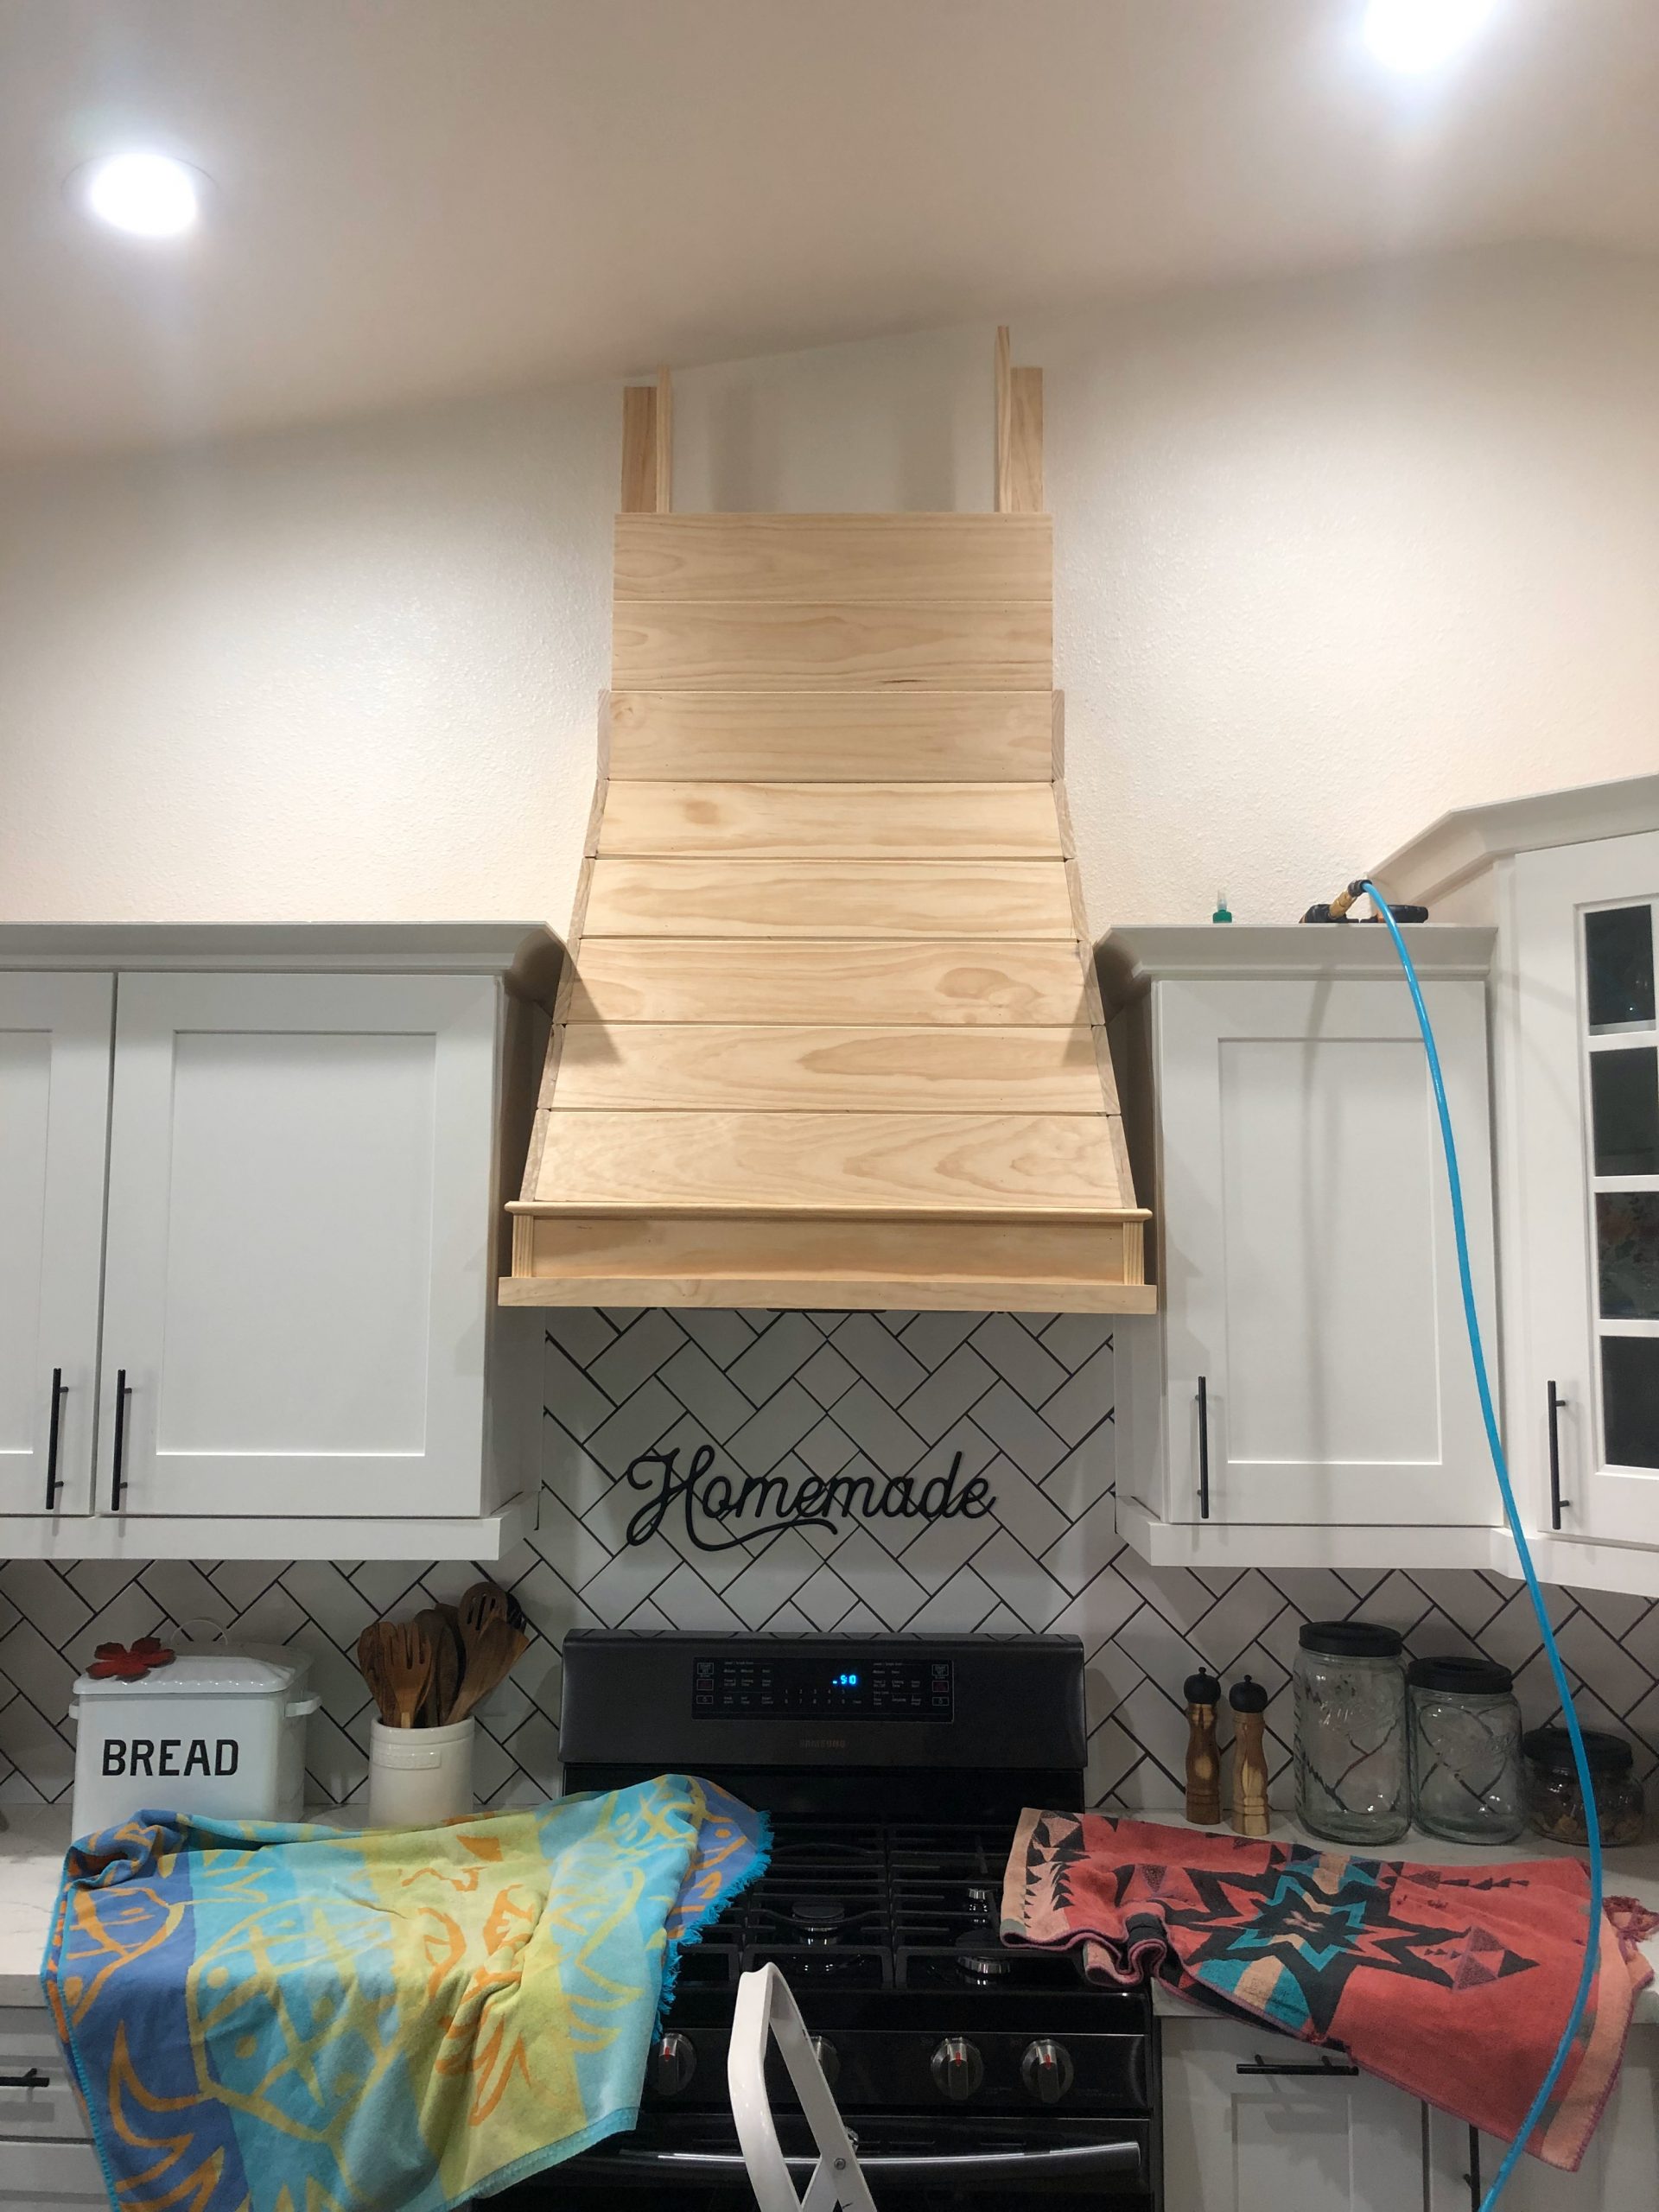
Lastly, he added 1″ trim pieces to complete the look. If you’re not into the stain look you could also paint it or even burn it. If you don’t know what I’m talking about you can look it up on YouTube. It’s actually pretty cool. Very unique and different.
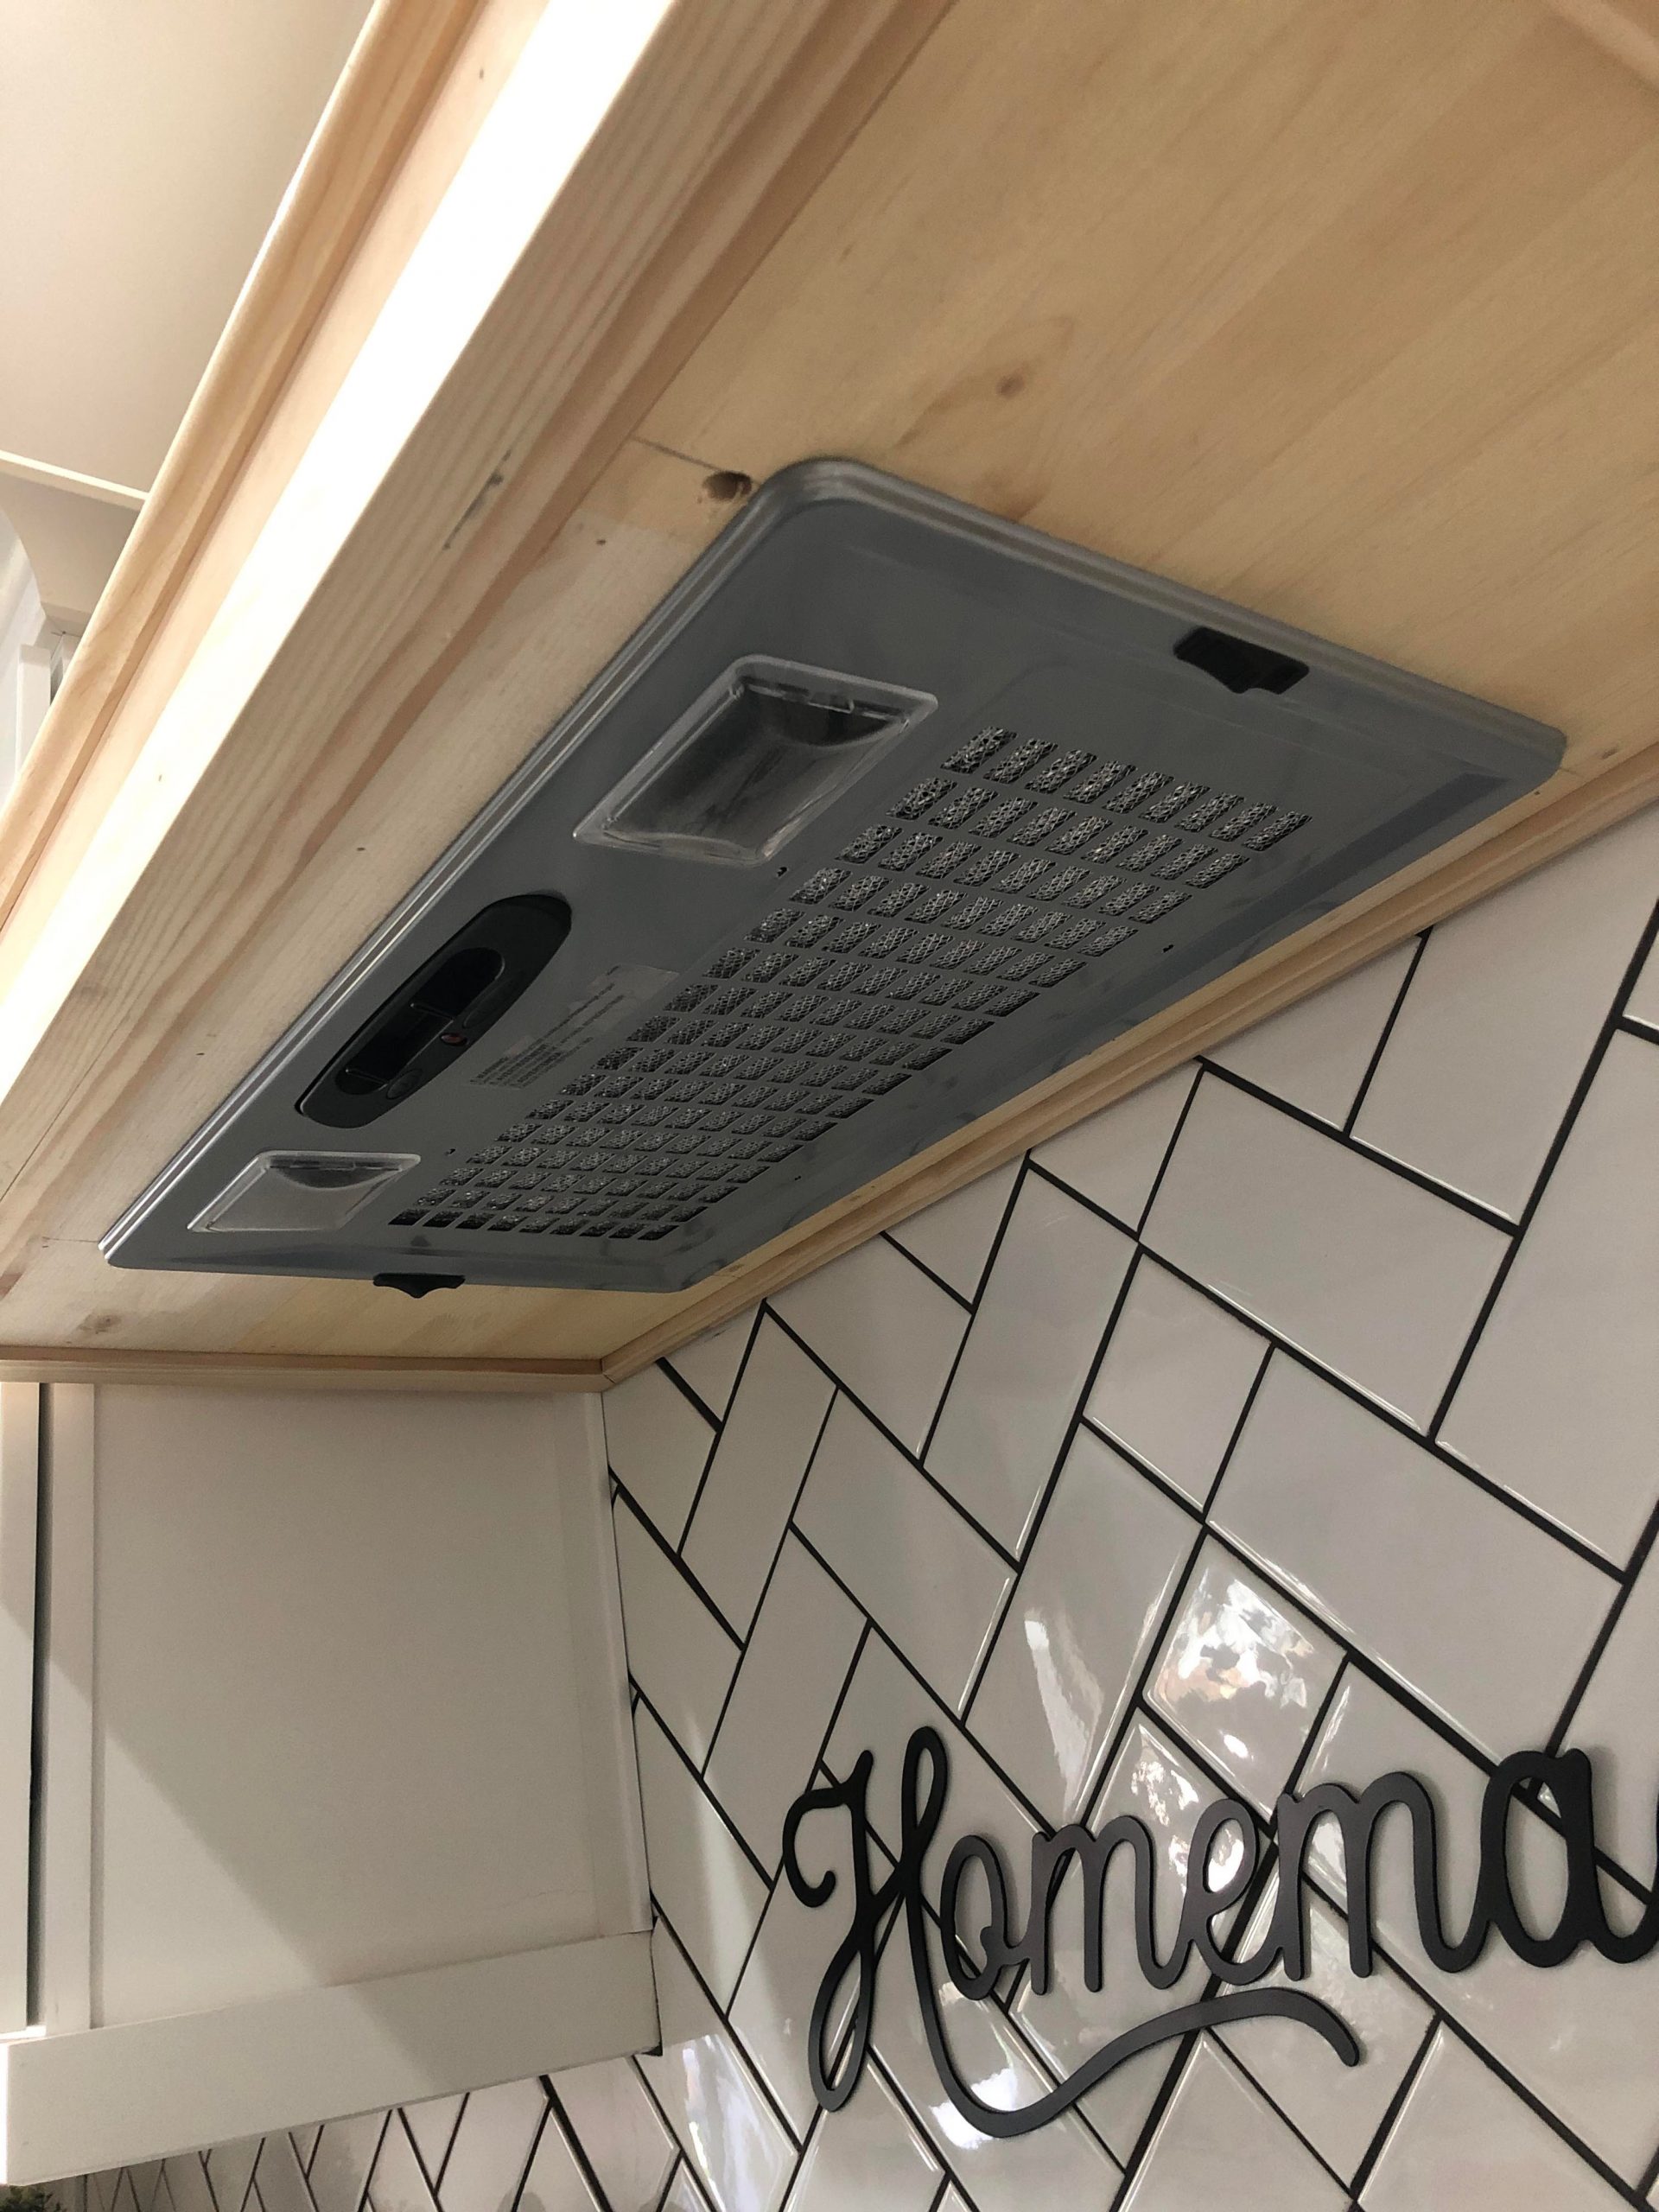
What’s cool about this particular vent hood insert is you do not need an exit for the smoke/steam from cooking. I researched for quite a while to find the perfect fit for our situation. It has really good ratings, a button for the exhaust and a button for a light . It’s nothing fancy but it’s perfect for our DIY hood. The hood is low enough that when you are walking around the kitchen you cannot see it at all. Plus the trim piece helps hid it too. Another great thing about it is the way we designed the hood, if you ever have problems in the future, it’s easy to remove, repair and/or replace. Ours is two years old now and has worked great, no issues whatsoever. The vent is electric and most all kitchens have a plug above the stove for a microwave or vent hood like this one.
Once all of the trim is up make sure you go and fill in all the holes with wood filler and do a light sanding to them before staining.I also use a wood conditioner before staining, it really helps absorb the stain. I don’t this I knew this before doing this project. So learn from my mistakes, haha. Make sure you wait to stain the trim pieces until after they have been nailed in and filling in. Just make sure that you buy wood filler that is stainable. You can find it at any hardware store.
I stained it with me favorite dark walnut stain.
One thing I would do different with this project is stain all the shiplap first before he put it together. I think after every project we have done I always discover something we should have done differently. This is normally, especially if you’re doing it for the first time. You always learn how to do things more efficiently.
It’s really hard to pick my favorite DIY to date. We have worked on so many since building this hood. It’s defiantly in my top 3. If you have been following along for a while with all of our DIY’s, do you have a favorite?
My top 3:
- Guest bathroom Renovation
- Chicken Coop
- DIY Vent hood
Jessie Thomas
11 Comments on “How to DIY a Stunning Modern Farmhouse Wood Vent Hood”
This looks AWESOME! I will definitely do this when we get our own home someday. Repinning for sure, thank you!
Thank you so much! Chickens are so much fun!
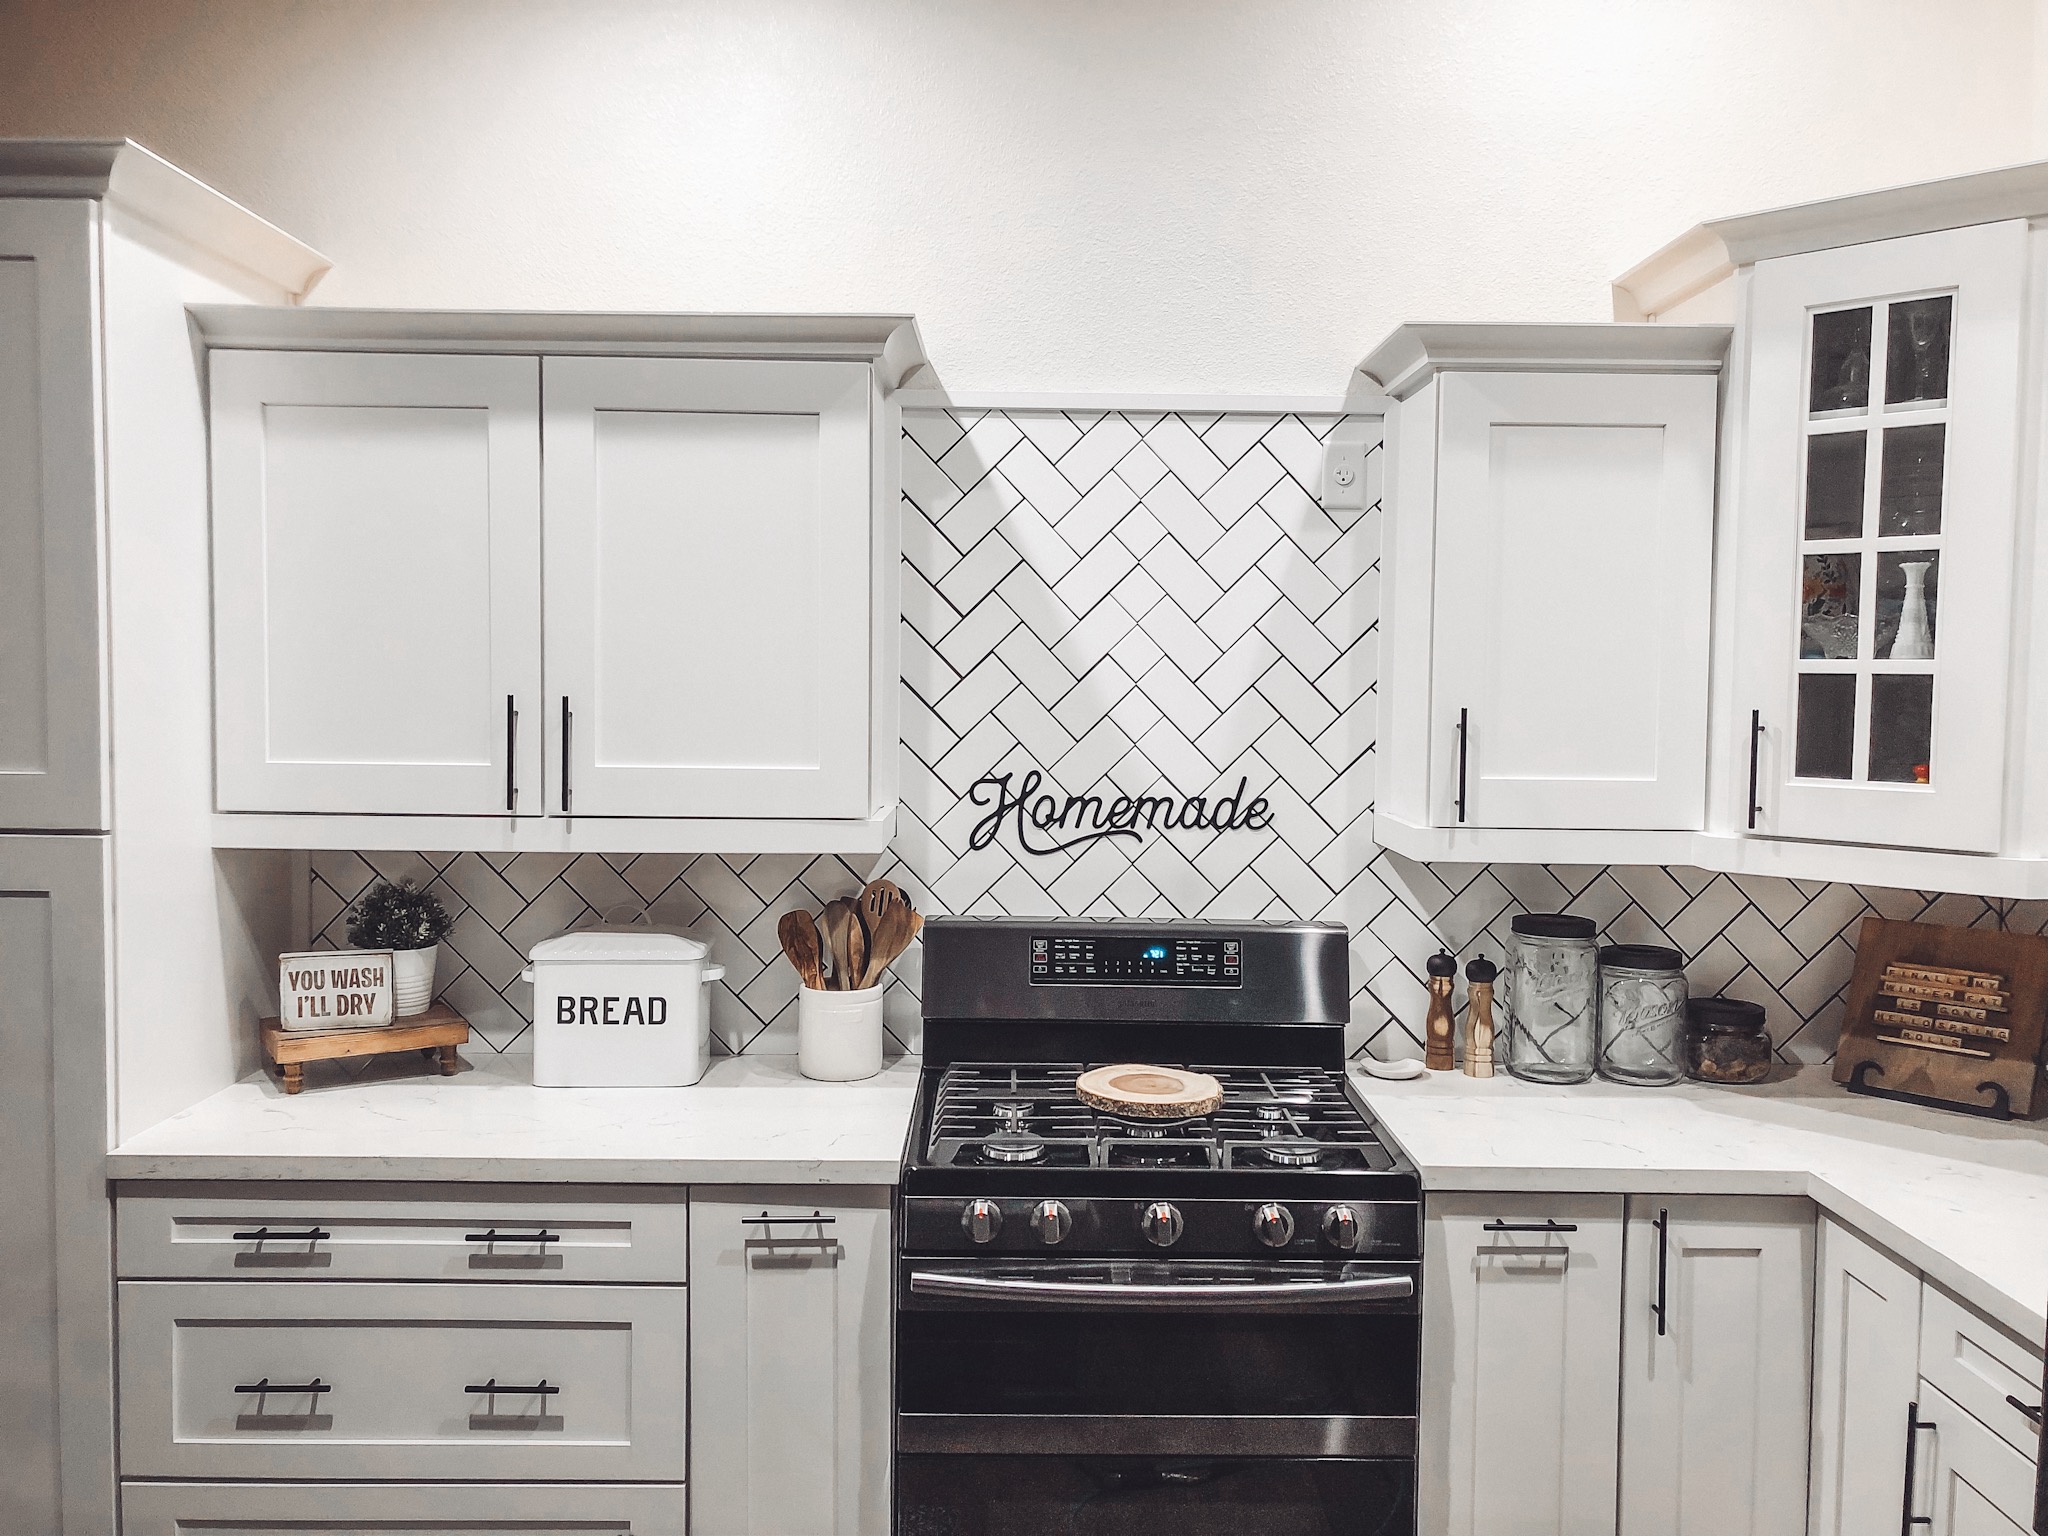
Oh Wow! That wooden vent hood looks amazing! I love the backsplash as well. Nice job!
Thanks so much! We love how it turned out!
This looks really great – I love the stain you put on the wood!
This turned out so awesome! I never know why vent hoods are sooo costly! I just don’t understand… it’s literally just a cover/cabinet over the vent!
You guys did an awesome job! Very impressive.
Thank you so much Becky!
Love the look of it! Sometimes I wish I was more into DIY, you can make so many nice things for your home for lower prices than store bought!
Pingback: Great Ideas That Make Your Small Farmhouse Kitchen Modern and Beautiful - LightLady Studio
Can you please give information on make and model of the vent itself.
Gorgeous install and lovely step by step instructions. Thank you!
Can you tell me more about the vent itself? Im interested in a unit that doesn’t need to vent out a wall or ceiling.